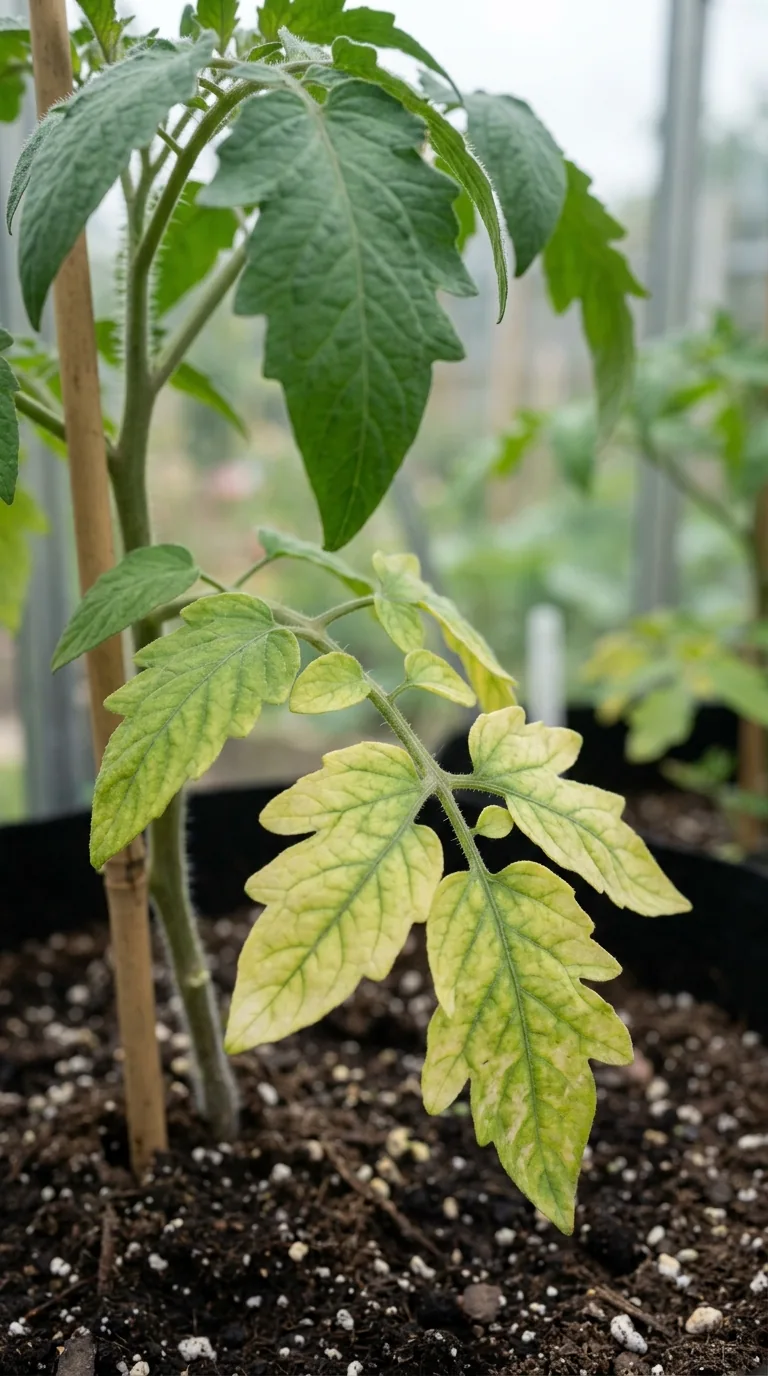
Yellow leaves are a symptom, not a diagnosis. A plant can lose green colour because of natural leaf ageing, unsuitable watering, damaged roots, poor light, nutrient availability, pests, disease or weather. Several of those causes can occur together. Before buying a feed or spraying a treatment, work out which leaves are changing, what the root environment is like and what happened shortly before the symptoms appeared.
The most useful first response is often a careful inspection. More water can worsen a saturated rootball, while more fertiliser cannot repair roots damaged by waterlogging. Removing every yellow leaf may hide the pattern you need to understand. Photograph the whole plant and a few representative leaves, then compare it with nearby plants and any recent changes in care or conditions.
Identify the plant and its normal pattern
Confirm the plant name where possible. A deciduous shrub turning yellow before autumn leaf fall presents a different situation from a young tomato losing leaves in early summer. Some plants naturally have yellow or variegated foliage. Compare with the expected appearance of that species or cultivar rather than assuming green is always the intended colour.
Evergreens also replace old leaves. A limited number of older inner leaves yellowing while healthy new growth develops may be normal. The key is the wider pattern: how much foliage is affected, how quickly it changes and whether shoots continue growing normally. A widespread rapid decline, wilting or dieback deserves investigation even when some seasonal leaf shedding would be expected.
Record when the problem began. Recent planting, a move from indoors to outdoors, repotting, a heatwave, prolonged rain or a cold night can all provide useful context. Ask whether the plant was fed or treated just before the change. A treatment history is often more informative than a close-up photograph of a single detached leaf with no surrounding information.
Map which leaves are affected
Look at old lower leaves, young tips, one side of the plant and shaded inner growth separately. Is the whole leaf uniformly pale, are the veins greener than the surrounding tissue, or are there spots and patches? Is the change accompanied by curling, stippling, brown margins or distorted growth? These details narrow the possibilities but do not identify a cause with certainty on their own.
If the problem affects only the side facing a window or exposed to wind, location matters. If every plant sharing a tray changes together, inspect their shared watering and growing conditions. If one plant declines while its neighbours remain healthy, look more closely at its rootball, stem and pests. Pattern recognition works best when it includes the whole planting rather than just the most dramatic leaf.
Do not rely on a chart that assigns every yellow pattern to one missing nutrient. Nutrient availability can be affected by pH and root health as well as the amount present in the soil. Cold, wet conditions may interfere with uptake even where a fertiliser has already been supplied. Diagnose the growing system before choosing another additive.
Check moisture before adjusting watering
Move aside mulch and feel the soil below the surface. In a pot, inspect several centimetres down where feasible and consider its weight. A dry surface can sit above a wet lower rootball, while a recently planted plug may remain dry inside moist surrounding ground. Check the actual root environment instead of deciding from the appearance of the pot's top layer.
Excessively wet conditions reduce air around roots and can contribute to yellowing, wilting and root decay. Check drainage holes, standing water in outer pots and any blocked saucer or tray. A container with no functional outlet cannot be managed like a free-draining pot. Stop adding water automatically while investigating, but do not allow a recovering plant to become severely dry as a reaction.
Dryness can also cause yellowing and leaf loss. Rewet gradually if the medium has become difficult to wet, then check whether water reached the rootball rather than merely running down the side. A plant with very congested roots may repeatedly dry even under a reasonable schedule. Correct the underlying container or establishment issue instead of accepting daily wilting as an unavoidable habit.
Inspect roots without unnecessary damage
For a small container plant that can be removed safely, gently examine the rootball. Look for a reasonable network of firm roots rather than relying only on colour, which varies by plant and medium. Soft, decaying roots and an unpleasant smell are more concerning than a few naturally dark roots. If roots circle densely, the plant may need an appropriate potting-on plan.
Do not rip a rootball apart merely to search for a cause. Disturbance can add stress and destroy useful evidence. A valuable specimen or a plant with unexplained rapid collapse may need specialist advice. For large shrubs and trees, avoid digging through major roots yourself. Describe symptoms, site conditions and the pattern of decline to an appropriately qualified adviser.
Recent transplanting can interrupt normal water uptake, especially if roots were damaged or the original rootball became dry. Check planting depth and whether the plant is rocking in wind. A stem buried too deeply or a rootball sitting above the surrounding soil can create problems unrelated to fertiliser supply. Correct installation issues carefully before repeatedly feeding the foliage.
Review light and exposure
A plant receiving too little suitable light may grow weakly and lose older leaves. A plant moved abruptly into strong sun can develop pale or scorched patches. Check the species' requirements and any recent move. A windowsill that worked in spring can become much hotter later, while an outdoor bed can be shaded as nearby trees develop their leaves.
Make changes gradually where possible. Moving a struggling shade-adapted plant directly into all-day sun may add a new problem. Likewise, moving a light-demanding crop into a dark room to protect it from one hot afternoon is not a long-term answer. Aim for a suitable position and manageable transition, taking temperature and wind into account as well as brightness.
In a greenhouse, check ventilation and temperature alongside watering. Hot conditions can cause stress even when the medium is wet. Opening a vent or using appropriate shading may address the environment more directly than increasing water. Avoid sealing plants in a humid enclosure without considering airflow, especially if leaf spots or fungal growth are also present.
Consider nutrients after checking roots and conditions
Uniform pallor beginning on older leaves can be consistent with nitrogen shortage, while some other deficiencies show different distributions. However, visual clues overlap and a plant may be unable to absorb nutrients because roots are damaged or pH is unsuitable. Before feeding, review the product already used, the date, dilution and medium. A recently fertilised pot does not automatically need another application.
For plants in containers, the initial nutrient supply may eventually be exhausted, particularly during active growth. Use a suitable feed at its stated rate and timing. Do not double the concentration to make a yellow plant recover faster. Over-application can damage roots or create an imbalance. If an error may already have occurred, obtain product-specific advice rather than improvising several corrective chemicals.
For open ground, a soil test can be useful where a persistent pattern suggests a nutrient or pH issue. Test representative areas and provide the intended crop or planting information. A pH test alone does not measure the complete nutrient status, and a nutrient test does not explain every pest or drainage problem. Use each result for the question it can answer.
Understand pH-related yellowing
Acid-loving plants can struggle in soil or water conditions that make particular nutrients less available. Young leaves may show yellowing between greener veins, but that appearance still needs context. Confirm the plant, medium and pH before selecting a treatment. A general feed may add nutrients without changing the root environment that limits uptake.
Where chalk-rich ground is unsuitable for an ericaceous plant, a well-managed container with an appropriate medium may be more realistic than trying to transform the entire border. Do not pour vinegar or household acids around the plant. Chemical changes need a defined purpose and suitable method. Plant choice can be the most durable solution to a site mismatch.
Look for pests and disease evidence
Examine leaf undersides, shoot tips and stems with good light and, if useful, a hand lens. Look for insects, fine webbing, sticky deposits, cast skins, feeding damage or visible fungal growth. Yellow stippling differs from a whole uniformly pale leaf, but identify the culprit before treating. A few harmless visitors are not proof that they caused the symptoms.
Leaf spots, mildew, rust pustules and distorted growth can provide further clues. Some viral problems cause mottled patterns, but a mottled leaf is not enough to name a virus. Avoid cutting and sharing propagation material from a suspect plant until the cause is clearer. Clean tools appropriately between plants where disease spread is a concern, and seek a reliable identification before selecting any control.
For houseplants or movable containers, temporary separation can make observation easier if a spreading pest is suspected. Keep the plant in suitable light and temperature during that separation. Do not quarantine it in a dark cupboard and create a second cause of decline. Treatment, if required, should match the identified problem and the product's authorised use, particularly around edible crops.
Include weather and accidental damage
Cold spells can affect tender growth and produce symptoms that appear after the event. Herbicide drift, fertiliser spills, cleaning products and pet urine can also cause localised injury. Ask what happened nearby rather than restricting the history to deliberate plant care. A sharp boundary or one exposed side may help identify an external event.
If cold exposure fits the timing and affected growth, review protecting garden plants from frost before the next forecast risk. Avoid assuming that every pale leaf after a cold night needs feeding. Protect remaining healthy growth appropriately and allow time to see whether the plant produces a normal new flush.
Use a staged response instead of several treatments
| Finding | First action | What to watch next |
|---|---|---|
| Wet pot trapped in an outer cover | Restore drainage and revise watering | Root condition and new growth |
| Dry rootball with side runoff | Rewet carefully and check delivery | Whether moisture remains accessible |
| Healthy plant losing a few old leaves | Check normal seasonal behaviour | Whether yellowing expands |
| Visible pest evidence | Identify the pest reliably | Spread and response to suitable management |
Change the clearest limiting factor first and record what you did. If you water, feed, repot, prune and spray on the same day, a later change is difficult to interpret. Some urgent problems need immediate action, but routine uncertainty is better handled systematically. Judge progress by healthy new growth and the rate of further decline, not by expecting a severely damaged leaf to become perfect again.
Know when to ask for help
Seek reliable advice when a valuable plant declines rapidly, a mature tree has extensive dieback, roots appear diseased or the problem spreads despite sensible care. Provide the plant name, whole-plant photographs, leaf details, root observations where safely available, location, weather and treatment history. A good description often produces a better answer than a close-up image alone.
Keep the original growing-medium bag or fertiliser label if a product problem is suspected. Record batch information and application quantities. This supports a useful discussion with the supplier or adviser and avoids uncertain recollections. Most importantly, pause unnecessary treatments while the cause remains unclear. A measured investigation gives the plant a better chance than repeatedly adding the next product advertised for yellow leaves.
Keep a useful recovery record
Choose one representative shoot and photograph it from the same angle every few days or at a sensible interval for that plant's growth rate. Note whether yellowing stops spreading, whether new leaves develop normally and whether the root zone remains suitably moist. A slow-growing shrub cannot be judged on the same timetable as a young salad plant. Keep expectations realistic and avoid repeatedly disturbing roots to check progress.
Remove fully dead material when appropriate, but retain enough evidence to recognise the original pattern. If the cause is corrected, future growth is often a clearer measure of recovery than old damaged foliage.

