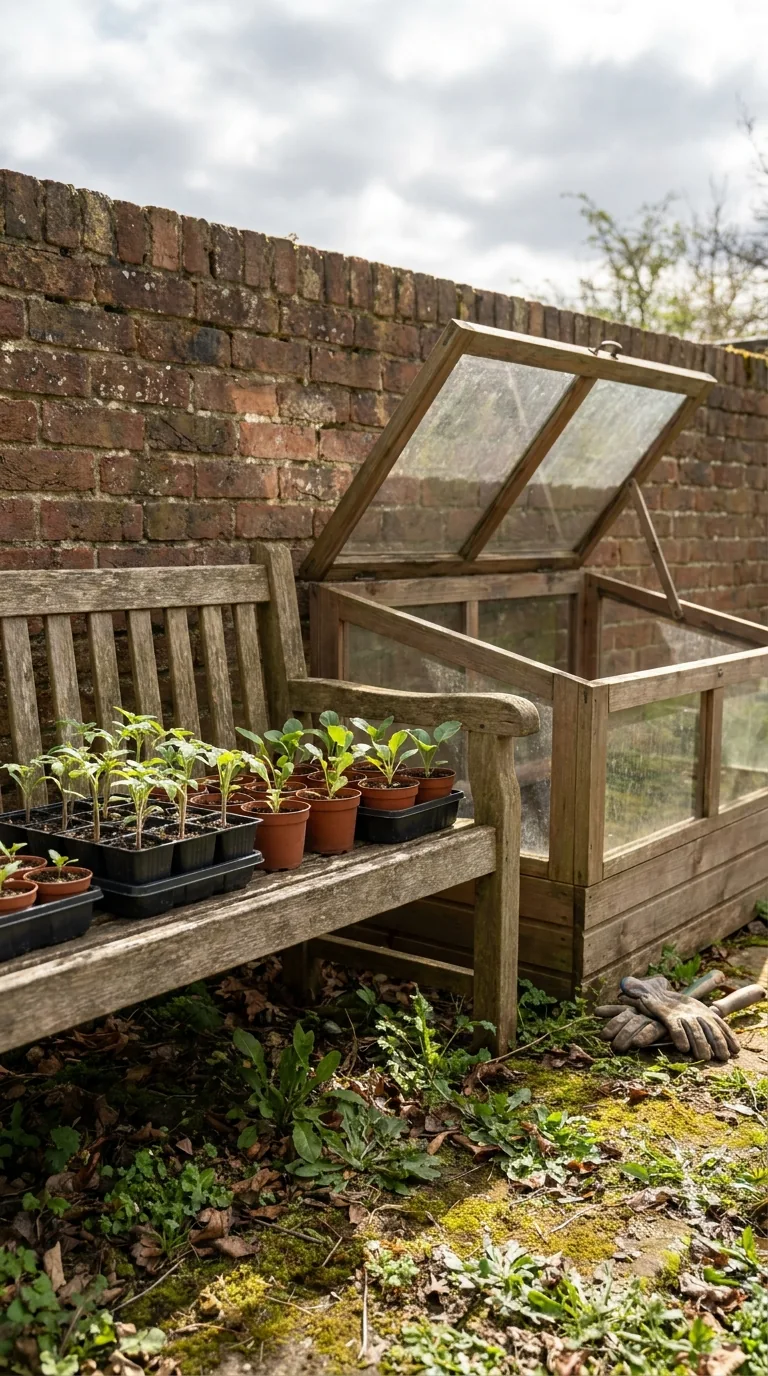
Hardening off helps plants raised indoors or under glass adjust to the conditions outdoors. Inside, seedlings may have enjoyed steady warmth, little wind and filtered light. Outside, direct sun, moving air, cooler nights and changing humidity can be a shock. A gradual transition reduces avoidable setbacks and makes it easier to check whether plants and weather are genuinely ready for planting.
The process often takes around two to three weeks, but it is not a rigid countdown. A hardy lettuce raised in a cool greenhouse differs from a tender courgette grown on a warm windowsill. Weather can require pauses or a temporary return to shelter. Most importantly, hardening off does not make a frost-sensitive crop frost-hardy. A well-acclimatised tomato can still be damaged by freezing or prolonged unsuitable cold.
Identify the plant and its final destination Start by checking the species, variety and intended growing conditions. Hardy vegetables, half-hardy flowers and tender summer crops should not all be moved through the same schedule automatically. Know whether the final destination is an outdoor bed, a patio container or a greenhouse. An unheated greenhouse is still a changing environment and can become very cold overnight, so moving into one may itself require acclimatisation.
Check the plant's recommended temperature requirements and planting season. Do not rely on a broad label such as summer vegetables to supply that detail. Newly bought plants may have been raised in warm protected conditions even if they are displayed outdoors briefly at a shop. Ask or inspect their condition where information is available. Treat soft, large-leaved plants cautiously and plan the transition around their needs rather than the convenience of clearing an indoor shelf.
Check that seedlings are healthy enough to move Look for compact growth, healthy leaves and roots that hold the compost together without being densely congested. A weak seedling stretched by inadequate light does not become sturdy simply by spending a cold night outdoors. Correct the growing conditions and handle it carefully. Check for pests beneath leaves and around pots, because moving plants into a shared cold frame can spread an existing problem.
Water as needed before beginning exposure so the rootball is not already dry. Avoid starting immediately after stressful repotting if the plant is struggling. If roots are tightly packed and planting will be delayed, pot on appropriately rather than leaving the plant to deteriorate throughout the transition. Keep only as many spares as can be grown well. A manageable number of sound plants is easier to acclimatise than several crowded trays that must be moved in a rush.
Choose a sheltered first position For the first outdoor sessions, choose a spot protected from strong wind and harsh direct sun. A bright sheltered area with gentle light is usually easier than an exposed south-facing patio at midday. Put pots on a stable surface where pets, birds or a gust cannot overturn them. Avoid placing tender trays in a low hollow known to collect cold air, even if that spot is conveniently beside the back door.
The position must remain practical to reach. If moving plants requires a complicated journey every evening, it is easy to forget a tray during a cold spell. Group compatible plants in sturdy carriers without trapping water beneath them. Label crops clearly and keep a simple list of what is outside. Convenience is useful when it makes consistent care more likely, provided the convenient place also meets the plant's light and shelter needs.
Begin with short daytime exposure Start during suitable mild daytime weather and return plants to their previous appropriate protection afterwards. A few sheltered hours can be a reasonable first step, adjusted to the crop and conditions. Check leaves during the session rather than assuming every plant will respond equally. Wilting can reflect drying, wind or sudden sun exposure, so inspect compost and the surrounding conditions before deciding on the response.
Increase the duration gradually when plants remain comfortable. The aim is progressive exposure, not achieving a particular number of outdoor hours despite a cold wind. Cloudy weather can make the first transition gentler, but very cold, wet or stormy conditions are still unsuitable for vulnerable seedlings. Keep the earliest sessions easy to reverse. If a tray begins to struggle, move it back to shelter and review the cause instead of leaving it outside to toughen up through damage.
Increase sunlight as well as time Glass and indoor positions filter or reduce the light reaching leaves. Direct outdoor sun can scorch plants that have not adapted, even when the air temperature seems pleasant. Introduce stronger light gradually, observing for pale or bleached patches, dry edges and persistent wilting. Do not make the first outdoor session a full day in bright spring sunshine because it happens to be warm.
Temporary shading or a sheltered position can help at the beginning, but plants intended for sun eventually need increasing exposure to that environment. Avoid moving from deep shade to a sunny final bed in one step at the end. Turn or reposition containers thoughtfully so one side is not permanently shielded while the other receives all the exposure. Keep foliage clear of hot walls or reflective surfaces where local conditions differ from the general air temperature.
Introduce wind without exposing plants to gales Moving air increases water loss and can flex stems that have grown without much movement indoors. Begin in shelter and expose plants to ordinary outdoor air progressively. A windbreak may reduce damaging gusts while still allowing circulation. Avoid a completely sealed arrangement that simply recreates greenhouse conditions, but do not expect a slender seedling to tolerate an exposed roof terrace immediately.
Inspect supports and labels after windy sessions. A plant rubbing against a cane or pot edge can suffer damage unrelated to temperature. Tall seedlings may need careful support without tying stems tightly. If a forecast includes strong cold winds, pause the process or use suitable shelter. Wind chill does not lower plant temperature in exactly the same way it affects human comfort, but wind can increase drying and physical stress, so conditions still matter beyond the thermometer reading.
Manage cold-frame ventilation deliberately A cold frame can provide an intermediate environment. Begin with the lid opened appropriately during mild daytime conditions, closing it when protection is required. Increase ventilation gradually as plants adapt and the weather permits. A frame in sunshine can heat rapidly, so it needs observation even on a generally cool day. Do not leave plants sealed beneath glass because the overnight forecast looks chilly.
Secure lids against wind and make sure water drains rather than collecting around pots. Keep plants spaced enough to inspect and rotate trays if light is uneven. Tender plants may still require a warmer night location during cold weather. The frame moderates exposure; it is not guaranteed frost-free accommodation. If the structure is difficult to monitor, a simpler routine of sheltered daytime outings and a reliable indoor return may be safer for valuable tender plants.
Keep night protection until it is genuinely appropriate As daytime exposure increases, the decision to leave plants outside overnight needs its own check. Review the crop's tolerance and the local forecast, including minima, wind and possible ground frost. A daytime temperature that feels warm does not prove the coming night is suitable. In cold or exposed UK gardens, this stage may arrive later than in a sheltered coastal location.
For tender crops, continue returning plants to appropriate protection whenever nights are unsuitable. Hardy plants may progress sooner, but their age and condition still matter. Do not infer safety from a single mild night or a regional average last-frost date. A forecast cannot guarantee the exact temperature around every leaf, especially in a known frost pocket. Keep a practical backup plan so a return of cold weather leads to a manageable move rather than an emergency search for space.
Check moisture more frequently during the transition Small containers can dry quickly outdoors because wind and direct light increase water loss. Feel the compost and lift pots where practical. A tray that stayed moist for several days indoors may need more frequent checks outside, even if the weather is not hot. Water the rootball as needed and allow excess to drain, avoiding a routine that alternates between drought and saturation.
Rain does not always rewet pots evenly. Leaves can intercept it, and dense roots or very dry compost can prevent water reaching the centre. Inspect the actual rootball rather than assuming that a wet patio means every plant is watered. Conversely, prolonged rain can saturate small pots in a poorly drained tray. Keep drainage holes clear and empty collected water. Moisture management is part of acclimatisation, because a dehydrated plant cannot respond well to increased light and air movement.
Pause when weather turns unsuitable Hardening off is flexible. A cold snap, persistent heavy rain or strong wind is a reason to reduce exposure and protect vulnerable plants. Do not continue the timetable merely because a certain day number has arrived. Briefly returning a plant to shelter does not erase all progress, although a long spell in warm dim conditions may mean the transition needs to be rebuilt more gently.
Use the pause to inspect roots, spacing and plant health. Pot on if necessary and keep the light adequate. Avoid pushing growth with heavy feeding to compensate for a weather delay; soft new growth creates another acclimatisation challenge. If seedlings have become oversized because sowing was too early, note that for next year's plan. The immediate goal is to maintain healthy plants while waiting, not to force an unsuitable outdoor move to rescue an overambitious schedule.
Plant out when weather, soil and roots agree Choose a suitable planting day, avoiding harsh sun or strong drying wind where possible. Prepare the bed and supports before removing plants from containers. The soil should be workable and appropriate for the crop, rather than saturated or cold simply because the air has warmed. Water rootballs as needed beforehand so plants move with evenly moist roots.
Handle the rootball gently, using the correct planting depth for the crop and recommended mature spacing. Firm carefully and water to settle the soil around roots. Keep labels and supports secure. Temporary shelter or fleece may help during establishment when appropriate, but it does not justify planting tender crops into a clearly unsuitable forecast. Check the following days for drying, slugs, wind rock or damage. Hardening off prepares the plant; establishment still requires ordinary aftercare.
Use a flexible example rather than a fixed rule Consider a tray of outdoor tomato plants that has grown in a bright warm room. During the first suitable period, give them short sheltered daytime outings and return them to frost-free conditions. Over the following days, extend the sessions and gradually increase direct light and ordinary air movement. During the later part of the process, judge whether local nights are consistently suitable before considering any overnight exposure.
If a cold spell interrupts the second week, protect the plants and resume more gradually when conditions improve. The total process may extend beyond the original plan. A tray of hardy lettuce raised in a cool greenhouse may need a shorter or less cautious transition, while very tender plants from warm conditions may need longer. These examples show why the crop's history matters. They are not instructions to expose every plant for identical hours on identical days.
Make the routine easy to maintain
Set a reminder for returning tender trays to shelter during the early stages, and check the forecast before leaving home for the day. Keep a spare sheltered location available if wind increases while plants are outside. If someone else will move the trays, label which group needs which treatment rather than assuming all plants are interchangeable. A clear routine prevents an otherwise careful transition failing because a tray was forgotten overnight. Reassess the arrangement as plants grow heavier and need more room.
Diagnose setbacks before changing several things Scorched leaves may indicate too much sudden sun, while wilting may reflect dry compost, wind or root problems. Yellowing and poor growth can have several causes. Check the plant and its growing medium rather than assuming every setback means insufficient hardening. Old damage may remain visible after conditions improve, so look at new growth and whether symptoms are progressing.
The vegetable watering guide helps establish a root-focused routine after planting. Keep a short record of sowing, acclimatisation and planting dates, plus weather interruptions. That record can guide next year's sowing window so seedlings are ready when the garden can receive them. Successful hardening off is a steady transition that leaves healthy plants established in suitable conditions, not a test of how much cold or wind a young seedling can endure.

