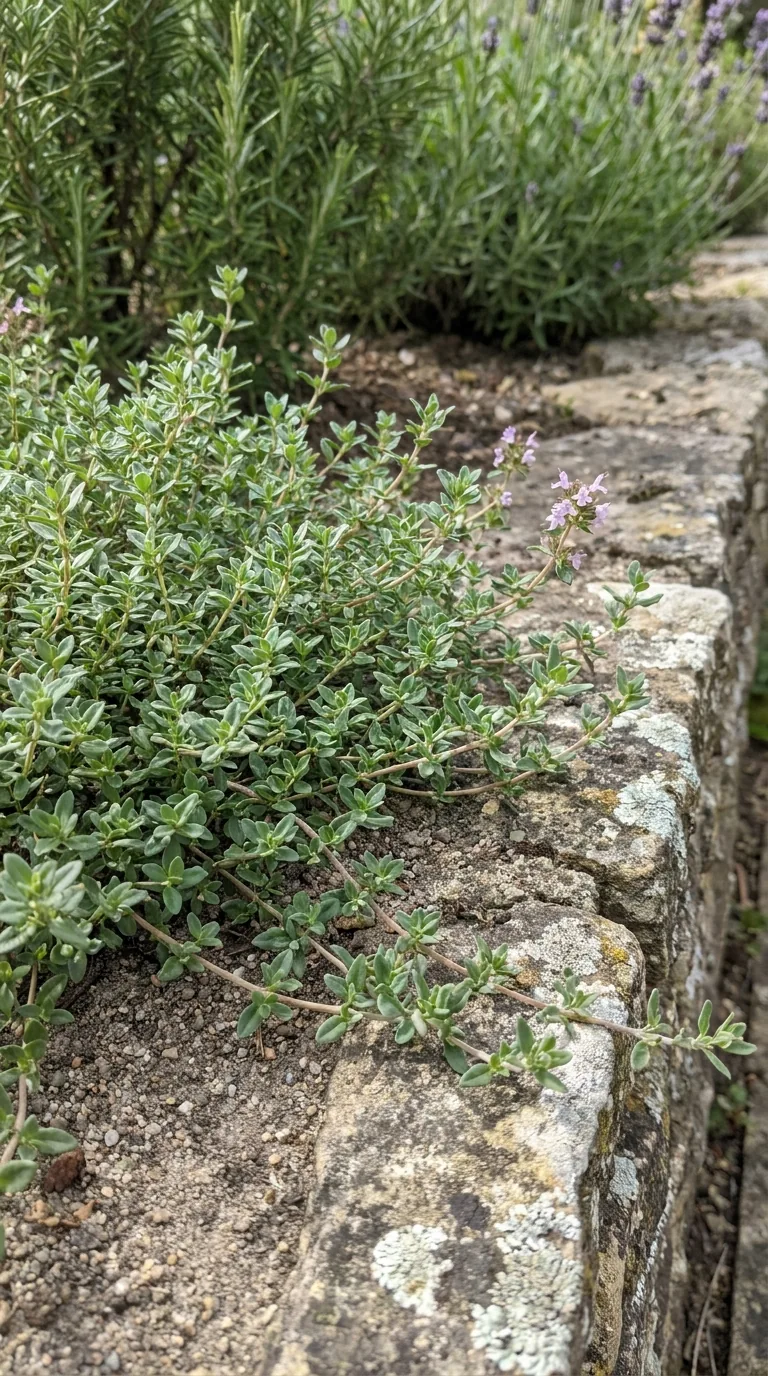
Thyme is a small herb with a useful combination of culinary leaves, evergreen structure and summer flowers. Its size makes it suitable for pots, raised edges and small sunny borders, but a compact plant is not necessarily an undemanding plant in every location. In Britain, success depends particularly on light and drainage. Persistent winter wet can damage a thyme that coped well with summer dryness.
The most reliable approach is to start with a healthy plant, give it a sunny, freely draining root environment and trim it while stems are still leafy. Heavy feeding, permanently wet compost and cutting far into old bare wood are unlikely to improve it. A few simple checks through the seasons are usually more valuable than a complicated treatment schedule.
Choose the right type for the job
Common culinary thyme, Thymus vulgaris, has a bushy habit and the familiar flavour used in savoury dishes. Lemon thyme selections offer a different aroma, while creeping thymes spread low across the ground. Variegated forms can be decorative but still need appropriate light and drainage. Read the label for mature dimensions, hardiness and culinary suitability instead of treating every plant sold as thyme as identical.
A creeping variety may soften the edge of a raised bed, whereas an upright culinary selection is easier to pick in a kitchen container. Plants intended for paving gaps should not be expected to withstand constant heavy foot traffic. Thin soil between slabs can dry sharply in summer and stay wet beside poorly laid paving in winter, so inspect the actual site before buying.
Choose plants with healthy leaves close to the base and several fresh shoots. Avoid a specimen with a dead, hollow centre surrounded by a few long stems. Check that the compost is neither bone dry nor sour and saturated. A small well-branched young plant is often easier to establish than an oversized, woody pot that has been neglected on a sales bench.
Read the site before improving it
Full sun supports compact growth and useful aromatic foliage. Observe the space across the day, allowing for shadows from walls, fences and taller plants. A bright-looking shaded courtyard may still provide few hours of direct sun. In deep shade, thyme can stretch, become sparse and retain damp foliage for longer, so choose a different plant if you cannot improve the position.
Drainage is equally important. After sustained rain, check whether water sits around the proposed planting area and whether the soil remains sticky and airless. Do not create a small gritty pocket in otherwise waterlogged clay and assume the problem is solved. Surrounding dense soil can prevent that pocket draining. A raised bed with an appropriate growing medium and a clear drainage route may be a better option.
If the soil already drains reasonably well, you may need little alteration. Avoid turning the site into a rich, heavily manured bed. Thyme does not need the moisture-retentive treatment that benefits some leafy herbs. Remove persistent weeds before planting, because extracting their roots later from a low thyme clump can be difficult without damaging it.
Plant at a suitable time and depth
Spring is a convenient time to plant in many UK gardens, allowing roots to establish before the first winter. Early summer can also work with appropriate watering. Autumn planting is more dependent on local conditions: a mild, free-draining site is different from cold, wet ground with little establishment time remaining. Delay if the soil is frozen, saturated or extremely dry.
Water the nursery pot before planting. Make a hole wide enough for the rootball, set the plant at its previous level and fill around it gently. Do not bury the crown beneath a thick layer of soil or compost. Water to settle the roots, then check during the following weeks. A newly planted thyme needs moisture while roots establish even though the mature plant tolerates dry conditions.
Allow room according to the named variety's spread. Crowding several small plants tightly together gives an immediate full appearance but can reduce airflow and make later trimming awkward. Keep taller plants from leaning across the thyme. A little open space around a young clump is useful for observing its shape and removing weeds before they become entangled.
Build a container that drains through the whole profile
Use a pot with open drainage holes and a stable base. A modest young plant can begin in a smaller pot and move up as roots fill it. Putting it immediately into a huge container of wet compost can make watering difficult because roots occupy only a small part of the volume. Choose a shape that lets you remove the rootball later without breaking the container.
Fill with a peat-free, free-draining container mix appropriate for herbs or long-term plants. Horticultural grit can help adjust some products, but its usefulness depends on the original compost and conditions. Do not use fine building sand or add a token handful of grit to a heavy, waterlogged mix and expect a complete solution. Follow the compost manufacturer's guidance where available.
A surface layer of clean grit can keep low foliage from resting directly on damp compost and make the pot look tidy. It does not show whether the compost beneath needs water, so check below it. Remove any saucer that holds rainwater outdoors, and use pot feet if the drainage holes otherwise sit against wet debris. A rubble layer in the base is not a substitute for an open outlet.
Separate establishment watering from mature care
After planting, check the original rootball until roots extend into the new compost or soil. It can dry independently from its surroundings, particularly if the nursery medium differs from the planting mix. Water gently around the roots when needed, then allow surplus to drain. Avoid repeatedly wetting the leaves and leaving the rootball dry.
Established thyme in suitable ground normally needs little extra water outside prolonged dry spells. Container plants need more frequent checks because their roots are confined. Let the surface begin to dry before watering again, while avoiding repeated severe wilting. The aim is not to prove how much drought the plant can endure, but to provide enough moisture for healthy, compact growth.
Use the pot's weight, compost feel and weather together. In a heatwave, a small terracotta pot may dry rapidly; in a cool wet week, the same plant may need no additional water. Automatic daily watering can be excessive unless you have checked the delivery and the plant's actual needs. A thyme sharing an irrigation zone with thirsty annuals may receive far more water than it uses.
Keep feeding proportionate
Thyme is not a crop that needs strong feeding to produce large soft leaves. In ordinary garden soil it may need no supplementary fertiliser. A plant growing poorly in shade or wet ground will not improve simply because more nutrients are added. Check site conditions first, including whether nearby plants have begun to overhang it.
Long-term pots eventually need some nutrient renewal, depending on the compost and growth. A modest application at the label rate during active growth can be appropriate if the plant requires it. Avoid stacking multiple products or adding fertiliser to a dry rootball. Repotting into suitable fresh compost may be more useful than repeated liquid feeds when the old medium has broken down.
Keep growth expectations realistic for the variety. A naturally low, slow-growing thyme will not become a tall bush just because it is fed. Excessive extension growth can make the plant less compact and more vulnerable to weather damage. Judge success by healthy shoots, useful flavour and a sound crown rather than maximum height.
Trim after flowering while leaves remain
Light trimming encourages a tidy, bushy outline and reduces the amount of bare stem that develops over time. After the main flush of flowering is often a useful opportunity, provided there is enough suitable growing season left. Trim the leafy shoot ends rather than cutting down into a mass of old, leafless wood. Leave green growth below your cuts.
Remove dead or damaged sections with clean scissors or secateurs. If frost has marked the tips, wait until spring growth shows which parts are alive before making major decisions. Do not shear a newly planted, weak or drought-stressed clump merely because another established plant is due for a trim. Its first need may be recovery and root establishment.
An old thyme with a bare centre may not regain a dense shape after severe pruning. Take cuttings from healthy green shoots or use rooted outer pieces as replacements where appropriate. Renewing an ageing plant is a normal part of herb gardening. Planning that renewal is more dependable than promising that every woody clump can be restored by one hard cut.
Harvest sprigs as part of shaping
Pick small leafy sprigs from different parts of the plant. This distributes the harvest and helps maintain the outline. New growth in spring and summer is especially convenient for cooking, while evergreen foliage can provide modest picking at other times. Winter regrowth is slow, so leave a generous amount of foliage rather than harvesting at summer rates.
Use scissors if stems resist a gentle pinch. Pulling hard can tear a low branch or loosen a recently established plant. Avoid taking all the tips from a small cutting before it has branched. If you regularly use substantial quantities, grow a second plant rather than repeatedly stripping the only one. Leave some flowering shoots if you want their appearance and visiting pollinators.
Rinse sprigs when necessary and dry them well. Fresh thyme suits many cooked dishes, and dried leaves are useful for storage. Dry healthy material in a clean, airy place away from moisture, then label it clearly. Remove tough stems before serving where appropriate. Discard mouldy material rather than assuming the herb's aroma makes it safe to use.
Make simple replacement cuttings
Choose healthy, non-flowering shoots during active growth, taking softwood or semi-ripe cuttings according to their condition. Prepare a small clean pot of suitable free-draining propagation compost. Remove lower leaves, insert the bare section carefully and firm the medium so the cutting remains upright. Several small cuttings can share a pot if they are not crowded together.
Keep them bright and sheltered, out of intense direct sun while roots develop. Maintain enough moisture to prevent wilting without saturating the compost. A cover can reduce water loss, but it needs inspection and ventilation. Leaves pressed against wet plastic can deteriorate, so avoid an arrangement that traps persistent condensation directly on them.
Once roots have formed and new growth is evident, pot the cuttings separately and acclimatise them gradually. Do not keep lifting them to inspect the roots, as that disturbs the developing system. Start with more than one if you want a replacement, because success is not guaranteed for every shoot. Avoid taking material from a plant with unexplained spreading dieback.
Protect against winter wet and exposure
Before winter, clear fallen leaves from the crown and pot surface. A damp mat of debris can keep low shoots wet and hide problems. Check that drainage holes are not blocked by roots or compost. Move pots away from gutters and places where water collects after rain. A sheltered wall can help, provided the location still receives enough light.
In a cold greenhouse or frame, keep the plant ventilated and check moisture occasionally. Protection from rain can be useful, but a covered pot can become too dry if forgotten for months. Avoid putting hardy thyme into a warm, dark room where it produces weak shoots. Shelter should improve the outdoor growing conditions rather than replace them with unsuitable indoor heat.
Hardiness varies among thymes and growing situations. Severe freezing affects exposed container roots differently from roots in the ground. A temporary sheltered position and insulation around the container can reduce risk, but no cover guarantees survival. Avoid sealing wet foliage tightly in plastic, and remove temporary protection when conditions improve so air can circulate.
Diagnose a thinning or browning clump
Look first at the pattern. A bare centre with healthy outer shoots often reflects age and the plant's woody structure. Widespread decline after persistent rain raises a drainage question. Brown tips following severe weather may be exposure damage. Each pattern suggests a different response, so do not immediately apply feed, fungicide or more water to every brown patch.
Check beneath the surface and inspect roots if the plant is failing seriously. A wet, airless rootball requires a different remedy from a light, dry pot. Fine pale speckling may result from sap-feeding insects, but minor marks do not necessarily justify treatment. Examine both leaf surfaces and compare new growth before deciding whether damage is continuing.
Keep a note of the site, potting date and pruning time. If a plant repeatedly fails in the same damp corner, replacement with another thyme alone is unlikely to resolve the cause. Change the growing position or choose a plant suited to the site. The most economical improvement may be moving one pot into sun and out of standing water.
A useful thyme routine is deliberately modest: give it sun, maintain drainage, water new roots and trim within leafy growth. Keep it separate from herbs that need consistently moist compost. For a tender summer herb with a contrasting need for warmth and more regular watering, growing basil indoors and outdoors explains how to choose a suitable windowsill or sheltered patio position.

