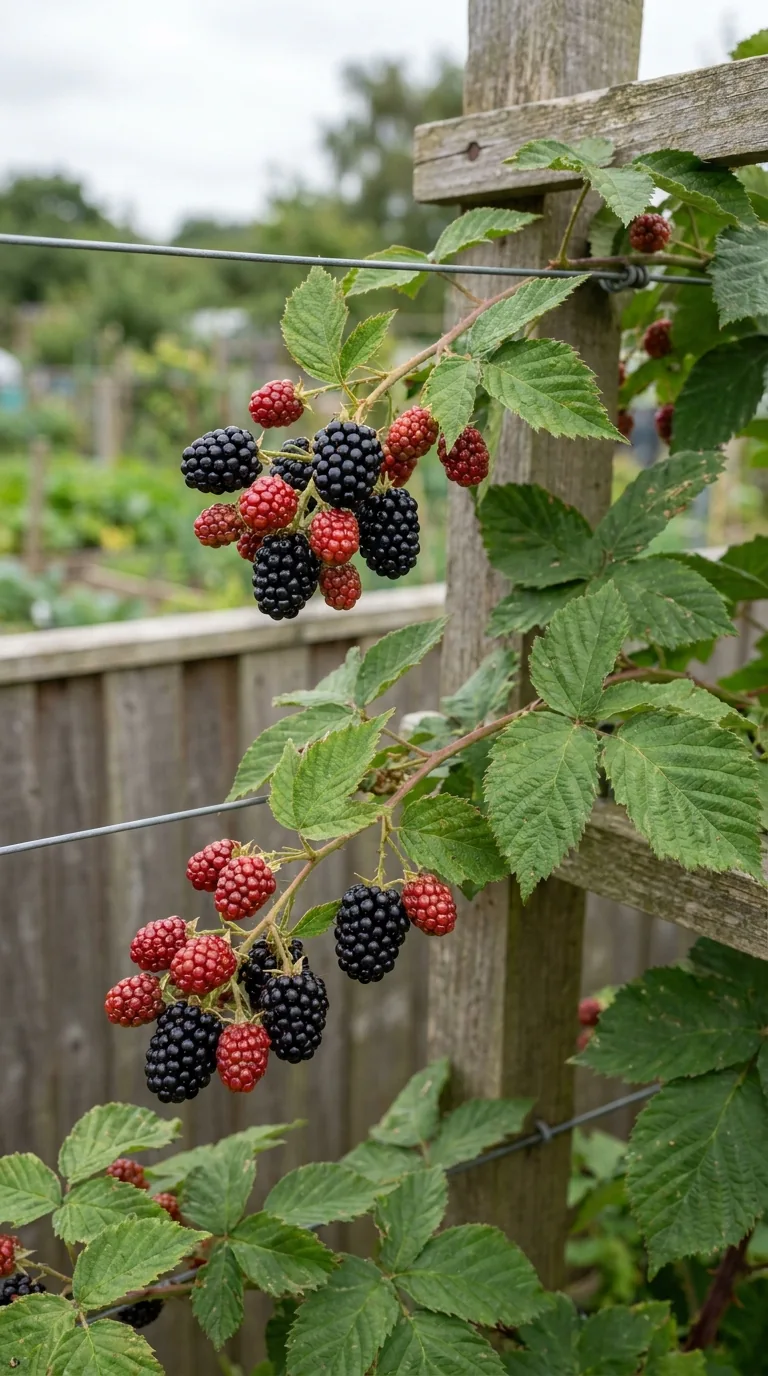
Blackberries can provide generous late-summer picking, but they need more planning than an empty corner and an occasional cut. Most garden varieties produce long canes that must be supported, separated and renewed. Left loose, those canes can arch into paths and root where their tips touch soil. A defined support system makes the difference between an accessible fruit crop and an increasingly tangled bramble patch.
Choose a named cultivar whose vigour fits the space, install sturdy wires and learn to distinguish canes carrying this year's fruit from the fresh canes that will fruit next year. That two-generation system is the basis of care for most conventional garden blackberries. Special primocane-fruiting cultivars are an exception and should be managed according to their specific instructions.
Choose a manageable cultivar
Cultivars vary in cane length, thorniness, harvest period and flavour. Thornless varieties are convenient near paths and for easy pruning, but thornless does not mean compact. Some still need several metres of supported width. Read the eventual dimensions and ask the nursery how the named cultivar is normally trained. Do not infer the mature size from a short cane in a small nursery pot.
A compact selection can suit a large container, while a vigorous trailing blackberry is better given a substantial wire system. Upright types still benefit from appropriate support, particularly once fruit adds weight. Choose harvest timing for your location: a very late cultivar may not ripen its entire crop in a cool, exposed garden before autumn weather deteriorates.
Garden blackberries are normally self-fertile, so one suitable plant can crop without a different cultivar nearby. Multiple varieties can extend the season, but each needs room. Hybrid berries such as tayberries and loganberries have related training requirements but should not automatically receive every detail intended for an ordinary blackberry. Keep the correct label and supplier information.
Understand the cane cycle
For the usual floricane-fruiting system, new canes grow one year and produce fruiting side shoots the following year. After those older canes have fruited, they are removed at the base. Fresh replacement canes are retained, trained and tied for the next crop. The crown and roots persist, while the useful cane population changes annually.
New canes are often vigorous, flexible and comparatively fresh in colour. Fruited canes have the side branches and remains of the crop you have just picked. Colour alone can be misleading, so trace each cane from the crown before cutting. Working on one cane at a time avoids accidentally removing a healthy replacement simply because its tip crosses an older branch.
An easy training plan keeps the generations separate. You might spread fruiting canes to one side and guide new canes to the other, reversing the arrangement next year. Alternatively, keep fruiting canes along the main wires and direct new growth separately until autumn. Choose a system you can understand and maintain rather than the most elaborate arrangement in a diagram.
Prepare the site for a long-lived planting
Choose a sunny, sheltered position for the best chance of good ripening, although blackberries tolerate light shade better than some fruit crops. Fertile soil that retains some moisture while draining well is useful. Avoid ground that stays waterlogged through winter. A dry strip beneath mature trees is also difficult because roots compete and overhead foliage reduces light.
Clear perennial weeds before planting. Once blackberry roots and canes occupy the site, removing bindweed or deep-rooted grasses becomes much harder. Improve poor soil appropriately with well-rotted organic matter, working when the soil is in a suitable condition. Do not compact wet ground or create a deeply buried pocket of fresh material beneath the crown.
When planting near a wall or fence, keep the roots far enough from the base to avoid the driest rain shadow and allow the plant to develop. Around 30cm or more is a useful minimum starting consideration, adjusted to the site and support. Leave access for pruning and picking, and check that the fence or wall fittings can carry the mature crop and wind load.
Install strong supports first
A common support is a set of horizontal wires fixed to secure posts or appropriate wall fittings. Several wire levels allow canes to be spread rather than piled together. The exact heights depend on cultivar and available space; levels around 45cm apart are a practical design approach for many home systems. The important features are strength, access and sufficient supported length.
Do not attach a vigorous plant to a failing lightweight fence without checking it. Once leafy canes catch the wind, forces increase. Use safe fixings suitable for the structure, keep sharp wire ends covered and avoid placing taut wires where people can walk into them. If installation requires substantial drilling or structural work beyond your experience, get competent help.
Leave enough working room beneath and around the wires. You need to reach the crown with secateurs and remove whole spent canes without dragging them through the replacement growth. A support that looks tidy while empty can be impractical once foliage fills it. Plan the route for old canes to come out and for new canes to be tied in.
Plant at the correct level
Autumn to early spring is a useful planting period when the soil is workable. Bare-root plants should be planted promptly while dormant, keeping roots moist until then. Container-grown plants can be planted at other suitable times with close aftercare, but avoid severe heat, frozen ground and waterlogging. Check the supplier's instructions for initial cane trimming.
For a potted plant, position the top of the rootball at its previous level. Spread bare roots carefully and use the recommended depth rather than burying the crown excessively. Backfill, firm gently and water to settle soil around the roots. Tie the initial growth loosely to the support so it does not rock in the wind while establishing.
Space plants according to the cultivar's expected spread. Vigorous types may need roughly 3–4m or more, while compact types can use less. These are planning ranges, not a reason to squeeze a vigorous plant into a narrow gap. One well-spaced blackberry can be easier to crop than two competing plants whose canes cannot be distinguished.
Water establishment and fruit development
Water newly planted blackberries during dry periods in their first growing season. Apply water to the root zone and let it soak in rather than making a brief surface splash. Established plants in suitable soil often need little extra watering outside prolonged drought, but check during fruit development, particularly on dry soils or beside a wall.
Containers need regular attention because the roots cannot explore beyond the pot. Choose a suitable compact cultivar and a generous stable container with drainage. Check moisture beneath the surface and water before repeated severe drying occurs. A plant in a large pot is not automatically self-sufficient, especially when long leafy canes are exposed to wind.
Avoid standing water around roots. A wet area is not helpful simply because blackberries can tolerate a range of garden soils. If growth is weak over saturated ground, investigate drainage before adding more feed. Keep watering decisions connected to root conditions, weather and plant size rather than a fixed daily schedule.
Mulch and feed proportionately
Apply a layer of suitable well-rotted organic mulch in spring when the soil is moist. Around 5–7.5cm is a commonly useful depth, while keeping a clear gap immediately around the cane bases. Mulch reduces surface drying and makes weed control easier, but it should not form a wet mound against the crown. Inspect beneath it occasionally to judge moisture.
A healthy plant in regularly improved soil may not need additional feeding. If soil is poor or the plant shows a confirmed nutrient need, apply an appropriate general fertiliser at its label rate in spring. Avoid using strong feed to compensate for shade, drought or crowding. Excessively soft extension growth creates more training work without guaranteeing better fruit.
Container plants depend more directly on the nutrients supplied in their growing medium. Follow the compost and fertiliser instructions and replenish appropriately during active growth. Plan eventual repotting or renewal rather than repeatedly adding feed to a physically exhausted rootball. Check drainage holes and root crowding as part of that assessment.
Train fresh canes before they become tangled
Guide new canes while they are still flexible, using soft ties at intervals. Avoid tight loops that cut into swelling stems. Spread canes so leaves receive light and future fruiting side shoots will be accessible. Do not bend a stiff cane sharply around a wire, because a hidden crack can later weaken it under fruit load.
Keep cane tips off the soil if you do not want new plants. Blackberries can root at the tip, turning an unnoticed trailing cane into an anchored extension of the patch. Inspect behind the support and beneath nearby plants during summer. Lift and remove unwanted rooted tips carefully, tracing them back so the parent cane remains identifiable.
Some surplus or badly positioned canes can be removed to maintain an accessible framework. Retain enough strong replacements for the following crop without keeping every weak shoot. The exact number depends on the cultivar and wire space. A fan of well-spaced canes is easier to maintain than a dense rope twisted around a post.
Remove spent canes after the crop
Once a conventional blackberry's older canes have finished fruiting, cut those spent canes near ground level. Wear gloves and suitable clothing, including with nominally thornless varieties that may still have rough or snagging growth. Trace each cane first and cut its ties, then remove it in sections if that is safer than pulling a long tangle through the plant.
Retain and reposition healthy new canes for next year's fruit. Tie them along the support with enough separation for side shoots. Remove dead or damaged material and check the crown while it is visible. Avoid leaving a collection of tall cut stubs that obstruct future work and snag replacement growth.
Do not apply this routine blindly to a primocane-fruiting cultivar. Those can fruit on current-season growth and may have a different recommended pruning system. If the label has been lost, observe the cropping pattern or ask a fruit specialist before cutting every cane. Correct identification is more useful than a confident but unsuitable calendar rule.
Protect fruit while keeping wildlife safe
Birds may take a share of ripening berries. If losses matter, use a supported fruit cage or taut, securely fastened netting kept away from the fruit. Loose netting tangled among canes can trap animals and make picking hazardous. Inspect protection regularly and keep access to flowering shoots available for pollinating insects when necessary.
Good spacing helps berries dry after rain and makes damaged fruit visible. Remove mouldy or overripe berries rather than leaving them among sound clusters. Check for unusual leaf or cane symptoms before attributing every poor berry to insects. Water stress, incomplete ripening and disease can look different and require different responses.
Avoid applying improvised household sprays to fruit. If a plant-protection product is needed, confirm its current authorisation for the crop and follow the full label, including any harvest interval. A small garden crop often allows hand removal and close monitoring, but the right response still depends on identifying the actual problem.
Pick fully ripe berries and store briefly
Colour is a starting clue, but a blackberry can look black before it is at its best. Ripe fruit should release relatively easily and have the cultivar's expected sweetness and softness. Taste a few and learn the difference for your plant. Do not pull hard at an unripe cluster and damage the adjoining berries.
Harvest regularly into shallow containers. Blackberries bruise and compress easily, particularly when wet or overripe. Refrigerate promptly if not eating them soon and use damaged fruit quickly where suitable. Freeze sound surplus in useful portions for cooking. Check stored berries and remove any that deteriorate rather than assuming the whole batch will keep for a fixed number of days.
Picking frequency depends on weather and the cultivar's ripening pattern. Several visits during the week often give better fruit than a single large collection after many berries have softened. An accessible support system makes those brief visits practical. Record the harvest window so you can decide whether the variety suits the time you are available to pick.
Maintain control over successive seasons
Inspect wires, posts and ties before spring growth fills the support. Remove weeds while the ground is visible and check for rooted tips beyond the intended boundary. Keep the cultivar label and make a simple note of which side holds replacement canes. These small records prevent confusion when all the stems are leafy and crossing.
If a neglected plant has become a thicket, work in stages. Identify the crown, remove clearly dead and spent material, then retain a manageable number of healthy canes. Avoid promising an immediate full crop after severe renovation; the result depends on which generation of wood remains and the health of the roots.
A manageable blackberry is a deliberately trained plant, with separate cane generations and enough space to reach the fruit. For a more compact bush fruit with a permanent branch framework, growing and pruning gooseberries explains open-centred pruning, annual care and the leaf checks that help identify sawfly damage early.

