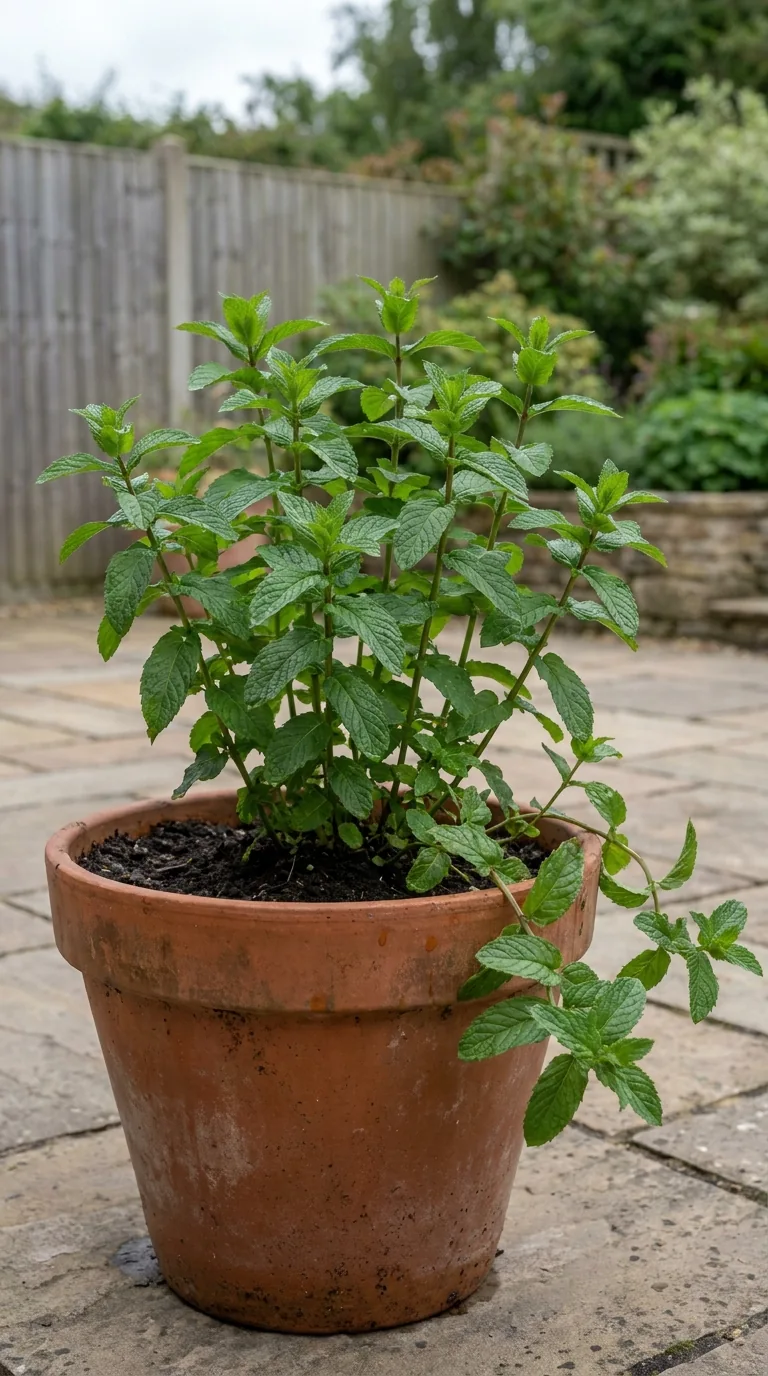
Mint earns its place in a small garden because a single healthy plant can provide many harvests of fresh shoots. Its vigour is also the reason to give it a defined home. The spreading underground stems that make a lush clump can move beyond a border and through neighbouring plants. Growing mint in a pot makes that behaviour easier to manage, but the pot still needs checking, watering and occasional renewal.
The best container routine balances containment with root health. A tiny, neglected pot may prevent spread while producing little usable growth. A generous container, suitable light and evenly moist compost allow mint to replace harvested shoots. Dividing the clump when it becomes congested keeps it useful without requiring an ever larger collection of heavy pots.
Understand the way mint spreads
Most familiar culinary mints are herbaceous perennials. Their leafy stems die back or become sparse in winter, while living roots and underground stems remain ready to grow again in spring. These underground stems, called rhizomes, can travel sideways and send up new shoots away from the original crown. Cutting the visible stems does not remove that spreading system.
Mint can also escape a pot when stems trail over the edge and root in nearby soil. Roots or rhizomes may emerge through drainage holes when a container stands directly on a bed for a long time. Containment therefore requires inspecting the underside and the surrounding ground, not merely choosing a pot on planting day. A pot standing on a hard surface is generally easier to monitor than one buried beneath surrounding foliage.
A buried bottomless container can reduce spread but should not be treated as a permanent, escape-proof barrier. Keep its rim above the soil and inspect around it. Where mint has already invaded a border, lift and trace the spreading stems carefully, returning to remove regrowth. Working patiently among neighbouring roots is usually more useful than chopping the soil repeatedly into small pieces.
Choose a flavour you will use
Spearmint is a practical starting choice for sauces, peas and potatoes. Peppermint has a stronger, cooler flavour and may suit drinks or particular recipes better. Moroccan mint is commonly chosen for tea, while apple mint has softer, often fuzzy foliage. Named varieties differ in height, texture and strength. Smell and, where the seller permits, taste a clean leaf before buying if the flavour matters to you.
Start with a labelled plant from a reliable nursery rather than assuming a seed packet will reproduce a named flavour precisely. Some mints hybridise, and seed-raised plants need not be identical to the plant you wanted. Vegetative propagation, such as division, preserves the characteristics of a healthy parent more predictably. Keep the label with the pot because young shoots of different varieties can look similar.
Inspect both sides of leaves for unusual spotting and check that the stems are sturdy rather than collapsing at compost level. Avoid choosing a plant simply because it is the tallest. Several fresh shoots with an established root system are preferable to a stretched, crowded clump that has been standing dry. A small plant can fill a suitable pot rapidly during active growth.
Select a manageable container
Choose a stable container with adequate root space and several open drainage holes. A pot around 30cm across is a reasonable practical starting point for one vigorous culinary mint, although compact types and newly divided sections can begin smaller. Container size is a management choice, not a universal minimum for every mint. Allow enough space for growth while keeping the pot light enough for you to move when needed.
Plastic retains moisture longer than unglazed terracotta in many situations. Terracotta is attractive and provides useful weight, but its porous walls can make the compost dry faster in summer. A frost-resistant pot is helpful if it will stay outdoors. A narrow-necked container makes future division awkward because the rootball may be wider than the opening, so favour a straightforward shape.
Fill with a peat-free multipurpose compost suited to outdoor containers. Mint prefers a moisture-retentive growing medium that still drains; it does not require the dry, gritty treatment often given to Mediterranean herbs. Do not put it in a sealed decorative vessel. A layer of stones cannot compensate for the absence of drainage holes, and it reduces the volume available to roots.
Plant without burying the crown
Water the nursery plant before removing it from its pot. Loosen only the outer roots if they are tightly circling, then position the top of the rootball at approximately the same level as before. Add compost around it, firm gently and leave a gap below the rim for watering. Water thoroughly enough to settle the compost around the roots and let surplus drain.
Stand the pot where its base can drain freely. If it sits on a patio, check that the holes are not pressed into soft debris. Small pot feet can make inspection easier. Avoid a permanent water-filled saucer outdoors; the aim is moist compost with air in it, rather than a stagnant reservoir beneath the roots.
Keep varieties in separate labelled pots if you want to retain their identities. A large mixed container can look appealing initially, but vigorous mint may crowd slower herbs and make later separation difficult. Mint is particularly unsuitable as an uncontained neighbour for a small rosemary or thyme plant that needs a drier root environment. Give each its own root space and watering routine.
Find the right balance of light and shelter
Mint grows in sun or partial shade. A place with morning sun and some afternoon shade can be convenient for container growing because it reduces rapid drying while still supporting fresh shoots. Deep shade is less productive: stems may stretch and the clump can become thin. Observe the light the position actually receives through the growing season rather than relying only on the direction the garden faces.
Shelter matters on balconies and exposed patios. Wind increases water loss and can damage tall shoots. A position behind a permeable screen or beside taller containers can help, provided it is not so crowded that air remains still around damp foliage. Leave enough room to turn the pot, check leaves and harvest without brushing through other plants.
An indoor pot can provide short-term leaves on a bright window, but most hardy mints are easier to maintain outdoors over the long term. A hot, dim kitchen encourages weak growth. If you bring a pot indoors for picking, consider rotating it with another healthy outdoor clump during suitable weather. Do not assume year-round warmth removes the plant's seasonal response to reduced daylight.
Keep moisture steady
Feel the compost beneath the surface before watering. A large plant can use water quickly, particularly when the pot is full of roots, but watering every day regardless of conditions can create problems in cool weather. Lift a smaller pot to learn how its weight changes between adequately moist and dry. Check the centre as well as the edge, because roots can leave water running down the sides.
Apply water slowly to the compost and allow it to soak through. If water immediately pours out while the rootball remains light, pause and repeat in stages. A severely dry clump may wilt and lose leaves. Rewet the rootball, move it temporarily out of harsh sun and wait for signs of recovery before taking another large harvest. Adding extra fertiliser to a dry plant increases stress rather than solving it.
Rain does not always water a container adequately. Dense foliage can direct drops away from the rootball, and a pot beside a wall may sit in a rain shadow. Conversely, prolonged winter rain can leave compost saturated when the plant is barely using water. Check the actual pot in both situations. Adjust the position or drainage rather than trying to solve every seasonal problem with the same watering frequency.
Feeding without encouraging weak growth
Fresh compost provides initial nutrients, and a vigorous newly potted mint may need no immediate supplementary feed. As a long-term container plant it eventually relies on replenishment. If growth is pale and modest during the active season despite suitable moisture and light, a balanced liquid fertiliser used at its label rate can be helpful. Follow the product instructions rather than combining several feeds.
First check why growth is disappointing. A pot full of old roots may respond better to division and fresh compost than to repeated fertiliser. Saturated roots, severe dryness or a dark position can also cause poor growth. Feeding these plants without correcting the cause may produce little improvement. There is no useful target of making mint the darkest possible green.
Refresh the upper compost when appropriate, taking care not to bury the crown under a thick new layer. Clear dead leaves from the surface so you can see emerging shoots and check for pests. Keep the pot rim visible. This simple housekeeping makes the plant easier to monitor and reduces the chance of trailing stems rooting unnoticed beyond the container.
Divide a congested pot in spring
A mint pot that dries very quickly, produces a ring of growth around an exhausted centre or contains a dense mat of rhizomes is ready for attention. Spring is a convenient time to divide as fresh growth begins. Water beforehand so the rootball is workable. Lift it onto a sheet or tray and identify firm, living outer sections with roots and healthy buds.
Use a clean knife or spade to separate manageable pieces. Discard dead, woody central material and any sections showing suspicious disease symptoms. You do not need to preserve every centimetre of rhizome. One sound section replanted into fresh compost can become a productive replacement; keeping every division merely creates more pots to water.
Wash or brush the original container, check its drainage holes and replant a healthy section at the previous depth. Water it in and harvest lightly while it settles. Keep the remaining divisions contained until you know what to do with them. Do not throw living mint roots into places where you do not want new plants; dry them thoroughly or use an appropriate garden-waste route if necessary.
Harvest shoots to encourage useful regrowth
Begin picking once a new plant is established and growing strongly. Take young shoot tips or cut leafy stems above a pair of leaves. This encourages branching and avoids leaving a collection of bare stalks with only the lowest leaves removed. Harvest from different parts of the clump rather than stripping one weak area repeatedly.
If a mature pot becomes tall and tired after flowering, cutting it back can stimulate a fresh flush, provided it has healthy roots, moisture and enough growing season remaining. Do not combine a severe cut with neglecting a dry rootball. Water and monitor the renewed shoots, then resume modest picking when there is sufficient leaf area. A recently divided plant needs a gentler approach than a well-established summer clump.
Allow some flowers to remain if you enjoy their appearance and visiting insects. There is a choice between maximising tender leafy shoots and letting the whole clump flower, rather than a rule that every flower must be removed. Keep a second pot for flowering if space allows. Late in the season, reduce heavy harvesting so that declining light and cooler temperatures are not competing with constant leaf removal.
Recognise problems before treating them
Rust-like orange or brown pustules, distorted shoots and severe leaf spotting merit close inspection. Mint rust can persist in affected material, so avoid propagating from a suspect clump. Isolate it from other mints and seek a confident identification before deciding whether to replace it. Do not assume every brown leaf is infectious: old leaves, drought and physical damage can produce different patterns.
Aphids may gather on soft tips. Small colonies can often be removed by hand or with a gentle water stream, followed by another check. Slugs and snails may chew young growth near the pot rim. Inspect after damp evenings and remove hiding places immediately around vulnerable pots. Avoid unverified companion-plant claims that mint will reliably exclude pests from other crops.
In winter, sparse or absent top growth is often normal dormancy. Check the roots and buds before discarding the plant. Keep the pot draining, remove dead stems when convenient and wait for spring growth. A hardy plant's roots can still be vulnerable in an exposed, repeatedly frozen container, so move the pot to a sheltered position during severe conditions without taking it into a hot, dark room.
Use the harvest and maintain the boundary
Pick leaves shortly before use, wash as needed and dry gently. Fresh tips suit tea, sauces and garnishes; surplus leaves can be frozen in small portions for cooked dishes. Drying gives another useful product, although flavour and texture change. Only use positively identified culinary mint from plants that have not received unsuitable treatments.
A successful mint pot is both productive and easy to inspect. Check its base and surrounding paving when watering, divide before congestion becomes severe, and keep labels with separate varieties. If you are planning a wider herb collection, growing rosemary in the UK explains the sunnier, better-drained conditions needed by a woody herb that should have its own container.

