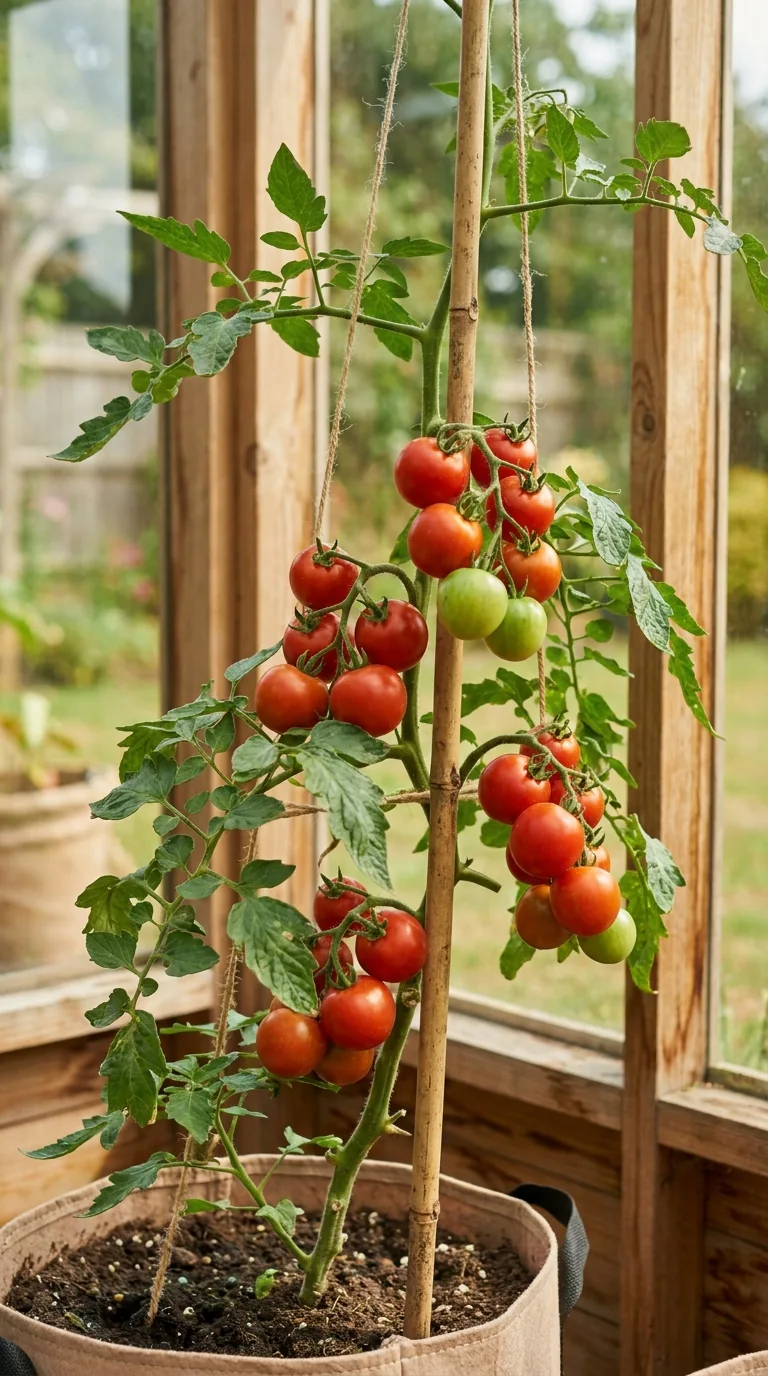
Tomatoes reward a little planning more than a very early start. In a UK garden, the main questions are where the plants will finish growing, how much sunshine reaches that position, and whether you can keep their roots evenly moist. A sheltered patio can be more useful than a large exposed bed. An unheated greenhouse extends the season, but still needs ventilation and protection during cold spring nights.
Begin with two or three plants rather than a crowded collection. You will find it easier to learn the difference between a thirsty pot, a plant needing support and a fruit beginning to ripen. Treat the dates below as starting points. Conditions in a coastal southern garden can differ considerably from those in an inland frost pocket or a northern allotment.
Choose the plant before choosing the sowing date
Tomato labels describe both the fruit and the growth habit. Cherry, salad, plum and beefsteak refer mainly to the crop you will eat. Cordon, bush and trailing describe how the plant grows and therefore how you must manage it. A cherry tomato can still become a tall cordon; small fruits do not necessarily mean a small plant.
Cordons, also called indeterminate tomatoes, need a strong upright support and regular removal of shoots forming in the joints between leaves and the main stem. Bush or determinate plants keep their branching shoots, which carry part of the crop. Trailing varieties suit containers where stems can hang without blocking a path. Read the actual cultivar instructions before pruning anything.
For a first outdoor crop, look for a variety specifically described as suitable for outdoor UK growing and relatively early cropping. A small-fruited type gives a more manageable introduction than a late beefsteak. Greenhouse varieties may perform outdoors in a favourable summer, but that is a gamble rather than a sound basis for a beginner's plan.
A realistic UK tomato calendar
| Growing situation | Typical seed-starting window | Decision before final planting |
|---|---|---|
| Greenhouse crop | Late February to mid-March | Enough warmth, light and frost protection |
| Outdoor crop | Late March to early April | Settled warm conditions after local frost risk |
| Buying young plants | Spring to early summer | A healthy rootball and a suitable final position |
Earlier sowing is only useful if you can maintain strong growth afterwards. A warm room may germinate seed quickly, yet its windowsill can supply insufficient light for several weeks. Plants then become tall, pale and difficult to handle. A later, compact seedling often settles better than a large plant that has spent too long in a small pot.
Work backwards from your own likely planting period. Allow time for germination, several weeks of seedling growth and gradual acclimatisation. If outdoor conditions remain cold, postpone planting even when a calendar says May. An unheated greenhouse is a shelter, not a guarantee of safe overnight temperatures; use a minimum thermometer to understand what happens there.
Sow a small, clearly labelled batch
Use clean pots or modules with drainage holes and fresh peat-free seed compost. Moisten the compost before sowing so it is evenly damp rather than saturated. Sow thinly at the depth on the packet, cover lightly, label the variety and date, and place the container somewhere warm. Around 18°C is suitable for germination, although the precise response varies with seed and conditions.
A propagator lid helps prevent the surface drying, but check beneath it daily. Remove the cover once seedlings emerge and move them into strong light. Keep the compost moist without leaving the tray standing permanently in water. A kitchen windowsill can work when it is bright and warm; keep leaves away from cold glass overnight and turn pots if seedlings lean towards the window.
Do not sow an entire packet merely because it contains many seeds. Four or five seeds can provide a small choice of seedlings without creating a potting problem. Keep any spare seed dry in its original packet, and mark the packet with the opening date for your own records.
Pot on without damaging the stem
Once seedlings have a couple of true leaves, move them into individual small pots. The first smooth seed leaves are different from the later tomato-shaped leaves. Loosen the compost beneath the roots with a label or dibber, and support the plant by a leaf rather than squeezing its delicate stem. Prepare the new planting hole before lifting the seedling.
Set an ordinary ungrafted seedling a little deeper if it has become stretched, then settle compost gently around the roots and water. Keep growing conditions bright. Roots should fill each pot reasonably well before another move, but do not leave plants circling a tight rootball for weeks. If you buy grafted tomatoes, follow the supplier's planting instructions and keep the graft union above the compost.
Prepare the final position and support
Choose a sunny, sheltered position where foliage will have room to spread and you can reach every plant. Avoid putting a pot directly in a roof's heavy rain runoff or in an exposed wind tunnel between buildings. Outdoor tomatoes benefit from a warm wall, provided the space is not so confined that leaves remain crowded and difficult to inspect.
For containers, use a substantial pot, commonly 30–45cm across for one plant, filled with suitable peat-free potting compost. Larger compost volumes are easier to keep evenly moist. A decorative outer pot must allow drainage; do not let hidden water collect around the inner container. Leave a little watering space beneath the rim.
Put cordon supports in position at planting rather than trying to drive a cane through an established rootball later. Anchor the cane securely and consider the weight of a fruit-laden plant. A tall pot may topple in wind even when its stem is tied properly. In beds, allow roughly 45–60cm between plants unless the cultivar instructions require more.
Harden off before outdoor planting
Plants raised indoors have not experienced outdoor wind, direct sun or cool nights. Over roughly one to two weeks, give them increasing daytime exposure in a sheltered position, bringing them under cover when conditions are cold. Start with gentle weather and avoid moving soft seedlings straight from a room into strong midday sunshine.
Hardening off improves tolerance of the change in conditions; it does not make tomatoes frost hardy. Delay planting when frost or a prolonged cold spell is forecast. Water the rootball before transplanting, ease it out intact and plant into moist compost or prepared soil. Water again to settle the roots, then check that the support and label are secure.
Water according to the roots
A tomato can wilt because its compost is dry, but wilting alone is not enough evidence to pour on more water. Check the compost below the surface and feel the pot's weight. A waterlogged rootball can also leave a plant unable to take up water properly. Always combine what the leaves show with what is happening around the roots.
Water thoroughly when needed, allowing excess to drain, rather than giving repeated tiny splashes that wet only the surface. In hot weather a container may need daily attention or more frequent checks; in cool weather the same pot may remain moist much longer. Avoid a fixed quantity that ignores pot size, plant size, rainfall and wind.
If several pots need different amounts, water them individually. A plant with a much larger canopy may use water faster than its neighbour. Mulch can slow evaporation in beds, but leave the immediate stem base clear. Before going away, arrange a reliable watering plan and test any irrigation equipment while you are still there.
Feed when the crop needs it
Potting compost usually contains an initial nutrient supply, so immediately adding strong feed is unnecessary. Once the first fruits begin to swell, a tomato fertiliser can support cropping. Follow its dilution and frequency instructions; different products are not interchangeable. More concentrated feed does not create a stronger plant and may damage roots or make water uptake more difficult.
Keep feeding and watering decisions separate. If a pot is dry, restore moisture appropriately rather than applying an extra-strong mixture. If a plant is weak in saturated compost, fertiliser will not correct poor drainage. Tomatoes in well-prepared garden soil may need less supplementary feeding than plants confined to containers, so assess their growth rather than copying the container routine automatically.
Manage cordons and bush plants differently
With a cordon, check for new side shoots while you water. Remove them when small, keeping the main growing tip intact. A flower truss emerges as a cluster of flower buds; it is not the same as a leafy side shoot in a leaf joint. Look carefully before pinching, especially on an unfamiliar plant.
Tie the main stem loosely at intervals using soft material that will not cut into it as it thickens. Remove badly damaged or decaying leaves, but avoid stripping a healthy plant bare in an attempt to expose every fruit. Leaves support growth and provide some shade. Bush tomatoes generally keep their side shoots, although heavily laden branches may need a small support.
Later in summer, stopping an outdoor cordon's tip above its final developing trusses can help concentrate attention on fruit already set. The right moment depends on the season remaining and the plant's vigour. It is more useful to inspect actual fruit development than to insist that every garden must stop plants on one particular date.
Recognise common fruit and leaf problems
| Observation | What to investigate | Useful first response |
|---|---|---|
| Dark patch at the blossom end | Uneven water supply and impaired calcium movement | Stabilise root moisture; damaged fruit will not repair |
| Cracked ripe fruit | Rapid moisture changes and cultivar sensitivity | Water consistently and pick ripe fruit promptly |
| Sudden brown leaf patches and fruit decay | Possible blight, especially outdoors in humid weather | Inspect promptly and separate affected material |
| Yellow lower leaves | Ageing, root stress, nutrition or disease | Check roots and pattern before choosing a treatment |
Blossom end rot is a physiological disorder, so spraying for fungal disease does not solve it. Blight is a different problem and can progress quickly. Do not identify a disease solely from one brown spot or assume every curled leaf signals infection. Compare several symptoms, including whether the stem and fruit are affected, and seek a reliable diagnosis when uncertain.
In a greenhouse, inspect leaf undersides for pests and ventilate during warm weather. A shut greenhouse can overheat surprisingly quickly even when the outdoor air feels pleasant. Keep access clear so opening vents and checking plants remains an easy daily job rather than something that requires moving a collection of crowded pots.
Harvest, review and plan the next crop
Pick fruit when it reaches the colour and firmness expected for its variety. Yellow, orange and striped tomatoes should not be left waiting to become uniformly red. Support the truss with one hand and detach the fruit carefully. Discard fruit showing rot, and use sound split fruit promptly rather than storing it for a long period.
At the season's end, bring sound fruit indoors to finish ripening if cold weather threatens. Clear the plants, remove ties and wash reusable pots and supports. Record the variety, first harvest, watering difficulties and whether the position supplied enough sun. These observations are more useful for next year's decisions than a promised yield that your weather never supported.
For another crop with a very different planting rhythm, read when to plant potatoes in the UK. Plan the two crops with their shared susceptibility to blight in mind, and avoid repeatedly using the same soil for closely related crops.
A two-plant patio example
Suppose you have space for two large pots beside a sunny fence. Choose one outdoor bush and one outdoor cordon, place the taller plant where it will not shade the bush, and secure its support to a stable structure. Keep enough room between pots to inspect the back of each plant. During the first week, check moisture at the same time each morning and note how quickly each container dries. Adjust the routine as foliage expands rather than assuming both plants always need identical care. This small comparison gives useful experience without making the whole season depend on one growing habit.

