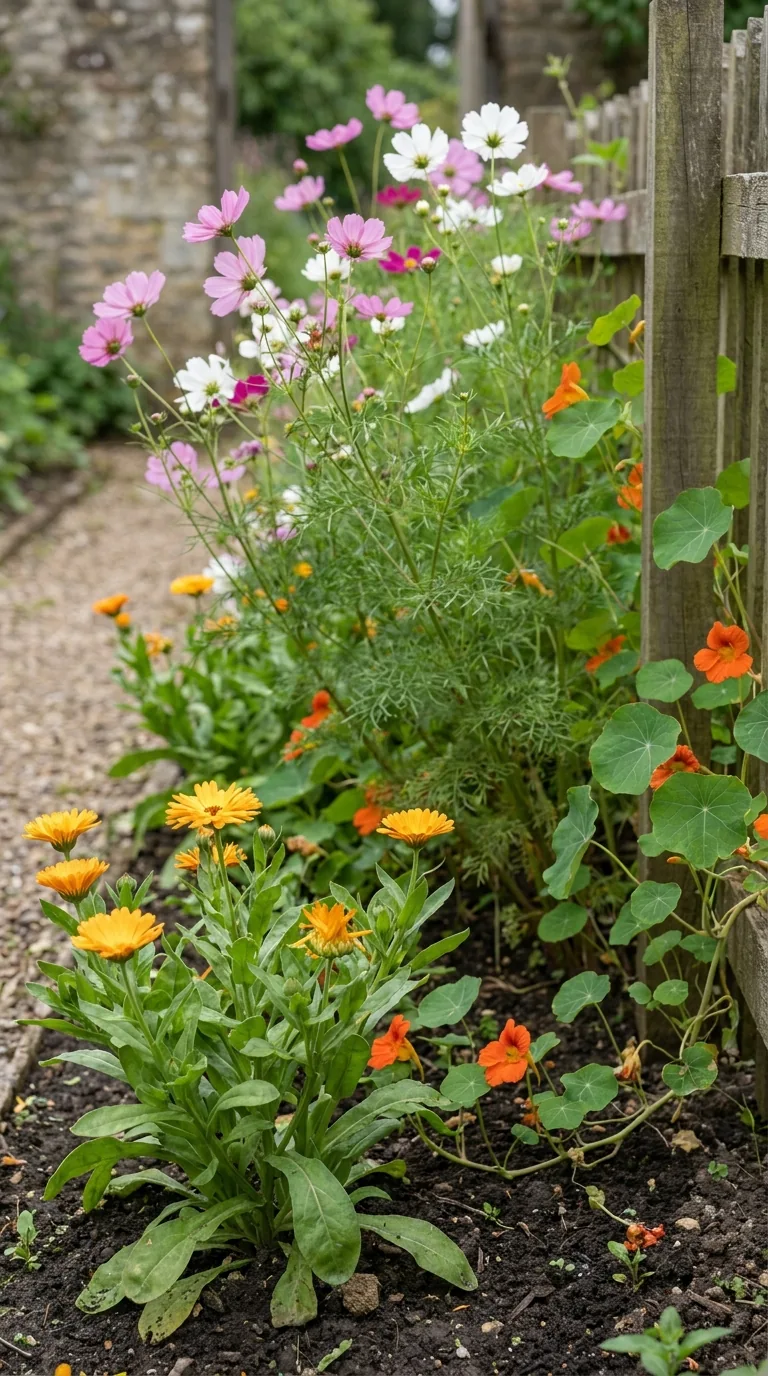
Growing flowers from seed makes sense when you want a generous display without buying every plant in a pot. The useful starting point is not a long shopping list. It is a small patch with enough light, a few suitable species and a plan for looking after seedlings while they are vulnerable. In Britain, weather and soil conditions vary considerably, so a sowing month is a guide rather than an instruction to sow into cold mud.
Annual flowers grow, flower and set seed within one season. Hardy annuals can usually be sown outdoors when conditions suit them; half-hardy annuals need protection from frost. That distinction determines how much indoor space and attention a project requires. Begin with two or three types rather than filling every windowsill. A manageable collection lets you recognise seedlings, thin them confidently and discover which flowers suit your garden.
Choose flowers for your conditions
Match a flower to the place where it will finish growing. A sunny open bed offers different opportunities from a windy balcony or a narrow border shaded by a fence. Many familiar annuals flower best in good light. A plant may survive shade while producing fewer flowers and weaker stems. Check the eventual height and spread on the packet, particularly when buying mixed selections with photographs that do not show scale.
Calendula, cornflowers and love-in-a-mist are useful choices for practising direct sowing. Nasturtiums have large seeds that are easy to place individually, although they should not be pushed outside ahead of suitable temperatures. Cosmos and French marigolds suit protected spring starts and later planting out. Poppies are better sown where they will grow because disturbing their roots can set them back. These differences matter more than descriptions such as “easy” or “instant”.
| Flower | Practical starting method | Broad sowing window | Important limitation |
|---|---|---|---|
| Calendula | Direct sow in prepared soil | Spring; autumn in suitable conditions | Thin seedlings so plants can branch |
| Cornflower | Direct sow or raise in modules | Spring; some autumn sowings | Tall forms may need support |
| Love-in-a-mist | Direct sow | Spring or suitable early autumn conditions | Avoid moving established seedlings |
| Annual poppy | Thin surface sowing outdoors | Spring or autumn according to type | Tiny seed is easily buried too deeply |
| Cosmos | Small pots or modules under cover | Usually spring | Plant outside after frost risk has passed |
| French marigold | Warm protected sowing | Usually spring | Cold wet conditions slow establishment |
These windows deliberately overlap. Follow the packet for the particular cultivar, then adjust for your garden. A sheltered southern plot can become workable before an exposed northern one. An unheated greenhouse may protect seed trays from rain but can still freeze at night. If you cannot supply warmth, light and frost protection, later sowing or buying a few young plants can produce a better result than an early indoor start.
Plan a small flower patch before opening packets
Measure the planting area and sketch broad groups rather than individual dots for every seed. For a strip two metres long and one metre deep, reserve the back for taller flowers and the front for shorter ones. Allow access from the side so you can weed without stepping between stems. Keep flowers that will lean or trail away from paths. Position tall annuals where their supports will not obstruct doors or cast unwanted shade.
Spacing is not an invitation to squeeze plants together until they touch on planting day. Suppose a compact cultivar needs roughly 25 centimetres between plant centres. Four plants along a metre is a reasonable starting sketch, with room near edges. A different cultivar needing 40 centimetres will fit fewer plants in the same strip. Use packet spacing to calculate your own quantities; do not assume all seed mixtures can be planted at the tightest spacing shown.
Sow a little more than you need, but not hundreds of extra seedlings. If the plan calls for twelve cosmos plants, one small batch with a few reserves is easier to manage than several trays. Spare plants still need light, compost and water. Giving them away is helpful only if someone wants them at the right time. Keep a label beside every sowing and note the date, variety and intended destination.
Direct sowing: prepare the surface properly
Remove established weeds first, including persistent roots where practical. Break up large clods and rake the surface until it is reasonably fine. You do not need to pulverise the entire soil profile. Seeds need contact with moist soil near the surface, while the ground below should remain open enough for roots and water to move. Avoid working clay when it sticks heavily to tools or boots; this can worsen compaction.
Water dry soil before sowing rather than trying to soak it forcefully afterwards. Draw shallow drills at the depth stated on the packet, sow thinly and cover gently. Rows make weed identification easier because flower seedlings appear in an organised pattern. For a more natural arrangement, use short curved drills within a defined patch. Broad scattering can work, but it is harder to thin and to distinguish seedlings from weeds.
Tiny seeds need particular care. Mix them with a little dry sand if that helps distribute them evenly, keeping the mixture well stirred. Some need only a light covering or pressing onto the surface; the packet takes priority over a general rule about seed depth. Do not bury all seed under a centimetre of compost. Place a visible label at the edge before walking away, because freshly sown soil quickly looks like any other bare patch.
Raising plants in modules and pots
Protected sowing gives you more control over moisture and makes it easier to shelter young plants from slugs. Use clean containers with drainage holes and a suitable peat-free seed compost. Moisten the compost, fill containers without compressing it hard, and sow at the recommended depth. Large seeds can be placed singly in modules. Smaller seeds may be sown thinly in a tray, then moved when they are large enough to handle.
Warmth is useful for germination, but emerging seedlings also need bright light. A tray left in a warm dark place after shoots appear can become long and weak very quickly. Move it promptly to a bright suitable position and rotate windowsill trays when necessary. Avoid trapping tender leaves against cold glass. If indoor light is poor, delay sowing rather than trying to keep stretched seedlings alive for many extra weeks.
When pricking out seedlings, hold a seed leaf rather than squeezing the delicate stem. Loosen the roots with a small tool and place each plant in a prepared hole. Water gently to settle the compost. Plants raised in individual modules usually need less root disturbance. Pot on only when necessary; a tiny seedling surrounded by a large volume of persistently wet compost can struggle, especially in cool conditions.
Thin and harden off at the right stage
Crowded direct-sown seedlings need thinning even when removing healthy plants feels wasteful. Thin in stages if you are uncertain, leaving the strongest reasonably spaced individuals. Water afterwards if the soil is dry. Without thinning, seedlings compete for light, moisture and roots, producing a mass of thin stems rather than a strong flowering patch. Do not assume heavy feeding will compensate for overcrowding.
Indoor-grown plants need gradual exposure to outdoor conditions before permanent planting. Start with a sheltered period outside on a mild day and bring tender plants back under protection at night. Increase exposure over roughly one to two weeks, adjusting for wind, strong sunshine and low temperatures. Hardening off reduces shock; it does not make a frost-sensitive species frost hardy. Delay planting out if the forecast is unsuitable.
Choose a mild planting day when possible. Water the rootballs beforehand, dig holes wide enough to take them without bending roots, and set plants at an appropriate depth. Firm gently and water the surrounding soil. Give newly planted flowers time to establish before judging their size. A small but sturdy plant often catches up well once it has good growing conditions outside.
Water, feed and support with a purpose
Keep the germinating seed zone moist without leaving it sodden. Use a fine rose or another gentle watering method so seeds do not wash together. Once roots develop, check beneath the surface rather than watering automatically each morning. Containers dry more quickly than beds, and windy weather can increase water demand even when the air feels cool. Aim water towards the root zone instead of repeatedly splashing flowers.
In reasonably fertile garden soil, annuals do not necessarily need regular fertiliser. Overfeeding can produce soft leafy growth that flops or flowers poorly. Container compost eventually runs short of nutrients, so follow an appropriate feed label as growth develops. Never double the concentration to encourage faster results. If leaves become pale or growth stalls, check drainage, root health and light before treating every problem as a nutrient shortage.
Put supports around taller annuals before they fall over. A few unobtrusive twiggy branches or a small ring support can be more useful than rescuing a collapsed plant later. Keep ties loose enough for stems to thicken. Avoid leaving sharp cane ends at face height near paths, and inspect supports after strong winds. Plants in a sheltered bed may need less support than the same cultivar in an exposed position.
Keep flowers coming without removing every seed head
Deadheading means removing faded flowers before the plant puts more resources into developing seed. Cut or pinch back to a suitable healthy junction rather than leaving long bare stalks. Regular deadheading can prolong the display of many annuals, but it cannot reverse the natural end of the season or compensate for drought. Some gardeners deliberately leave selected seed heads for appearance, seed collection or wildlife.
Make that choice plant by plant. Remove most faded calendula flowers while marking a few healthy heads for seed. Leave attractive love-in-a-mist seed capsules if they suit the design. Allow some sunflower heads to mature if birds can use them. Where self-sown seedlings would become inconvenient, collect or remove heads before they shed. Flowers grown beside paths or vegetable seedlings may need more careful seed control than a relaxed border.
A mixed flower patch can also include a permanent scented shrub for structure after annuals finish. If a sunny, free-draining position is available, the guide to growing lavender in British gardens explains how to choose a suitable type and avoid the winter wet that annual flower advice does not cover.
Save seed and learn from the season
Collect seed on a dry day when heads are mature and beginning to dry naturally. Use paper bags or breathable containers while finishing the drying process. Label each batch immediately. Storing damp seed in a sealed plastic bag encourages mould and can ruin a collection that looked healthy at harvest. Once thoroughly dry, keep seed somewhere cool and dry, away from fluctuating greenhouse temperatures.
Saved seed may not reproduce the parent exactly. F1 hybrids and plants pollinated by related varieties can produce different offspring. That can be enjoyable when you want variety, but it is unreliable when you require a precise colour or height. Never assume seed saved from ornamental plants is suitable for eating. Keep packets and collected seed clearly separate from food, particularly where children are helping.
At the season’s end, record what actually happened: which sowing established well, when the first flowers appeared, where stems fell and which plants were repeatedly damaged. Add notes about local frost, shade and watering rather than copying a national calendar. Next year, repeat the successful method and change one weak point. A modest patch that improves through observation is a stronger foundation than a complicated display that depends on constant rescue.
A useful first-week check
After sowing, inspect the patch briefly each day rather than digging for evidence of germination. Check that labels remain readable, the soil surface has not dried into a hard crust and birds have not disturbed the rows. Remove weeds while small. If germination is uneven, wait for the packet’s expected interval before resowing; a late second batch can otherwise crowd seedlings that were simply taking longer to emerge.
Recognise a failed sowing before repeating it
If a row remains empty beyond the packet’s expected germination period, examine the conditions before using more seed. Consider whether the soil dried after sowing, rain washed seed away, birds disturbed the surface or seedlings were eaten as they emerged. Try a small reserve sowing in a labelled pot using the same packet. This comparison can separate a difficult outdoor seedbed from a possible seed-quality problem without wasting the whole packet.

