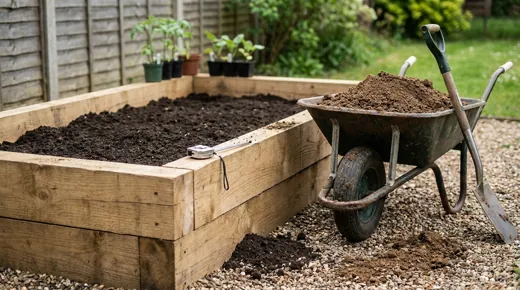
A raised bed is a contained area of growing soil above the surrounding level. It can make a vegetable patch easier to organise and reach, but it is not essential for growing vegetables. Suitable existing ground may grow crops just as well without a timber frame. Build one because it solves a specific problem, such as access, a defined planting area or modestly increased soil depth, rather than assuming every garden needs raised beds.
The best design begins with the site and the gardener. Width determines whether you can reach plants without stepping on the soil. Height affects cost, filling volume and structural loads. Materials must hold wet soil safely over time. Plan these together before ordering timber or bulk soil. A handsome frame in the wrong place can be awkward to water, shaded for much of the day and expensive to fill.
Choose a position before choosing a kit
Observe sunlight through the day and consider seasonal shade from buildings and trees. Most fruiting vegetables perform best with good light, while some leafy crops tolerate less. A sunny position close to water is often more useful than a larger bed at the far end of the garden. Keep reasonable access for carrying compost, moving a wheelbarrow and harvesting without trampling nearby plants.
Look at drainage after substantial rain. A raised bed can improve the immediate root environment, but it does not remove a high water table or solve flooding automatically. If water has nowhere to escape below or beside the frame, a deep bed can remain wet. Do not block existing drains or divert runoff towards buildings. Investigate persistent waterlogging before assuming extra height is the answer.
Check what lies beneath the site before digging posts or foundations. Avoid known services, inspection covers and tree roots. If the ground has a history of contamination, do not simply hide it beneath imported soil and assume food production is appropriate. Establish the nature of the concern and obtain suitable local guidance. A contained growing system may be possible, but the arrangement depends on the actual site.
Make access part of the dimensions
A bed reached from both sides is commonly kept around 1.2 metres wide or less, but personal reach is the important measure. A person working from one side may need a narrower bed. Mark the outline on the ground and practise reaching the centre without stepping inside. Account for the frame thickness, overhanging plants and whether you will kneel, stand or work from a seat.
Length is more flexible, but a very long bed creates detours and may require side bracing. Break a large area into manageable sections if this improves access. Paths should accommodate the actual user and equipment. A wheelbarrow, mobility aid or watering can needs more room than a narrow gap between frames. Avoid a layout that looks efficient on paper but forces sideways movement throughout the garden.
| Measurement | Why it matters | Practical check |
|---|---|---|
| Internal width | Controls reach into the growing area | Reach the middle from intended working positions |
| Internal length | Affects layout, bracing and access around ends | Walk around the marked footprint |
| Fill depth | Determines soil volume and root environment | Consider usable soil underneath |
| Path width | Controls everyday movement | Try the wheelbarrow or mobility aid |
| Frame thickness | Changes external footprint and cutting lengths | Distinguish inside from outside dimensions |
Choose a height for the purpose rather than defaulting to the deepest kit. A low frame over sound soil may simply define the growing area. A high frame can improve access for some users but holds much more heavy material and needs stronger construction. An elevated planter on legs is a different structure again, carrying the entire soil mass above ground. It requires a design rated for that load.
Select known, suitable materials
Timber is straightforward to work with, but species, thickness and treatment affect durability. Buy material with a known specification and ask the supplier whether it is suitable for the intended outdoor use, including edible growing where relevant. Do not use reclaimed boards with unknown coatings or contamination simply because they are free. Old railway sleepers and industrial timber can carry treatments inappropriate for a vegetable bed.
Metal kits can provide tidy durable frames, but edges, coatings, fixings and assembly quality matter. Masonry can last well but adds weight, skill requirements and permanence. Avoid assuming every alternative needs the same foundation or wall thickness. Tall retaining structures and beds on slopes may require professional design. A low home frame should not be treated as a substitute for an engineered retaining wall.
Consider replacement and maintenance. Timber sides eventually decay and may need repair while the bed is full. Screwed or otherwise appropriately assembled sections can be easier to maintain than inaccessible fixings. Check whether liners are part of the manufacturer’s system. A side liner may reduce timber contact with damp soil, but it must not create a sealed water-holding base unless the whole planter is designed accordingly.
Work out a cut list before assembly
First decide whether the stated bed size refers to internal or external dimensions. Timber thickness changes the length of end pieces depending on how corners join. Draw one corner at a larger scale if necessary. A simple butt joint, a corner post and a proprietary bracket can all require different cuts. Measure the actual boards, because nominal dimensions and finished sizes may differ.
For a hypothetical single-layer bed with an internal growing area of 2.4 by 1.2 metres and boards exactly 45 millimetres thick, suppose the end boards fit between full-length side boards. The two end boards would each be 1.2 metres long, while the two long side boards would each be 2.49 metres: the 2.4-metre internal length plus two board thicknesses. This describes corner geometry only, not a structural specification; posts, brackets and the actual joint can change the cut list. Write dimensions explicitly rather than cutting four pieces from a vague “2.4 by 1.2” label.
List boards, posts or brackets, suitable corrosion-resistant fixings and any bracing required by the design. Include tools, protective equipment and delivery access. Follow the kit or material supplier’s assembly instructions. Do not improvise screw sizes or bracing spacing for a tall bed carrying substantial wet soil. If you are uncertain about safe strength, simplify the bed or obtain advice before filling it.
Prepare the ground with the future roots in mind
Clear the footprint of debris and troublesome weeds. Where the bed will sit directly on suitable garden soil, roots and water should generally be able to move between the added growing layer and the ground beneath. Loosen obvious surface compaction when conditions are workable, without unnecessarily deep disturbance. Do not dig wet clay into a sticky mass that will later set into hard clods.
Persistent weeds need a deliberate strategy. A thin temporary covering may suppress annual weeds while breaking down, but it will not reliably eliminate every deep-rooted perennial. Impermeable sheets can block root access and drainage. Avoid placing a permanent sealed barrier under an open-ground bed merely to make the installation look tidy. Where a specialist barrier is required, understand its function and limits.
On paving or concrete, the bed functions more like a very large container. It needs an adequate root-zone depth, safe drainage and a suitable base arrangement. Water must not accumulate unnoticed or create a slippery route across a path. Confirm that the surface can support the wet load, particularly on a balcony, terrace or roof. These locations need explicit load checks rather than assumptions based on floor area.
Assemble square, level and stable
Mark the outline accurately and check corners before fixing the frame permanently. For a rectangular bed, matching diagonal measurements helps confirm that it is square. Check level along and across the frame, adjusting the foundation appropriately. Do not force boards into place over uneven ground and expect soil pressure to correct the shape. A twisted frame can stress joints and make filling uneven.
Use tools according to their instructions, clamp work where necessary and protect eyes and hands during cutting and assembly. Pre-drilling may help prevent splitting in suitable timber, particularly near board ends. Keep fixings clear of sharp protrusions on the finished bed. If children will garden nearby, inspect corners and edges carefully before the area is used.
Check stability before filling. A lightweight empty frame can be repositioned; a full frame may hold hundreds of litres of heavy soil. Fit the specified braces and supports first. Add soil gradually, watching for movement or bowing. If the frame shifts, stop and correct the structure rather than continuing to fill it in the hope that the problem will settle.
Calculate the filling volume
Use internal length multiplied by internal width multiplied by intended fill depth. With all dimensions in metres, the result is cubic metres. Multiply by one thousand to convert to litres. A bed 2.4 metres long, 1.2 metres wide and filled to 0.3 metres contains 0.864 cubic metres, or 864 litres, before any allowance for settlement. The frame’s full height and the intended soil level are not always identical.
That volume represents nearly eighteen nominal 50-litre bags if the material were bought entirely in bags, because 864 divided by 50 is 17.28 and you must round up. Bulk delivery may be more practical, but compare volume and product quality rather than assuming a “bulk bag” contains a standard cubic metre. Ask the supplier for the stated quantity and whether it is sold by mass or volume.
Wet soil is heavy. Do not translate litres into kilograms using a universal one-to-one rule; density varies with material and moisture. Delivery and handling can be a significant part of the job. Plan a route from the delivery point, a suitable wheelbarrow and manageable lifting quantities. Avoid arranging for a large load to be left where it blocks access or cannot be moved safely.
Fill with a suitable long-term growing medium
A ground-level vegetable bed commonly uses suitable topsoil improved with mature organic matter rather than pure bagged multipurpose compost. Exact proportions depend on the soil and materials available. Finished compost is an amendment, not automatically a complete stable substitute for mineral soil in a large permanent bed. Ask about quality and intended use, and avoid material containing obvious rubble, persistent weeds or undecomposed waste.
Do not fill a deep vegetable root zone with fresh woody debris and expect its level and nutrient behaviour to remain unchanged. Organic material decomposes and settles. If using a specific layered system, understand those consequences and whether the planned crops can root properly. For an ordinary beginner bed, a consistent appropriate growing layer is easier to manage than an improvised collection of materials buried out of sight.
Fill without stamping the soil hard. Gently level and water as appropriate to settle large air spaces, then top up later if required. Leave a sensible margin below the frame’s top for watering and mulch. The guide to choosing raised-bed depth explains why the soil beneath the frame changes how much added depth is useful.
Maintain the bed after construction
Raised beds can dry more quickly than adjacent ground, especially with exposed sides and well-draining fill. Check moisture beneath the surface and pay particular attention to new rootballs. Watering needs vary with crops and weather. Add suitable mulch to conserve moisture, leaving space around stems. Do not assume the construction stage has created a low-water system.
Inspect sides, corners and fixings periodically, particularly after heavy rain or winter. Look for bowing, loose fasteners, sharp edges and decay. Repair early while the defect remains manageable. Keep paths firm and free of trip hazards. If the surface level drops, assess whether ordinary settlement or decomposing fill is responsible before adding material indefinitely.
Finally, record the internal dimensions, filling materials and approximate quantities used. These notes help with future top-ups and repairs. A well-built raised bed should make gardening easier for its particular user and site. Its success depends on access, suitable soil, drainage and maintenance as much as the neatness of the frame.
Before sowing the first crop, walk around the filled bed with the tools you normally use. Check that watering reaches the far corners and that you can lean over comfortably without resting your weight on an unsupported edge. Small access problems are easiest to correct before plants and supports occupy the space.
Check the first winter carefully
During the first wet season, compare the bed with its surroundings after rain. Check whether water drains normally, paths remain usable and any liner still leaves outlets clear. Look for small gaps where fill escapes through joints. Repair these with an appropriate part of the construction system rather than plugging every opening with impermeable material. The aim is to retain soil while preserving the intended drainage route.