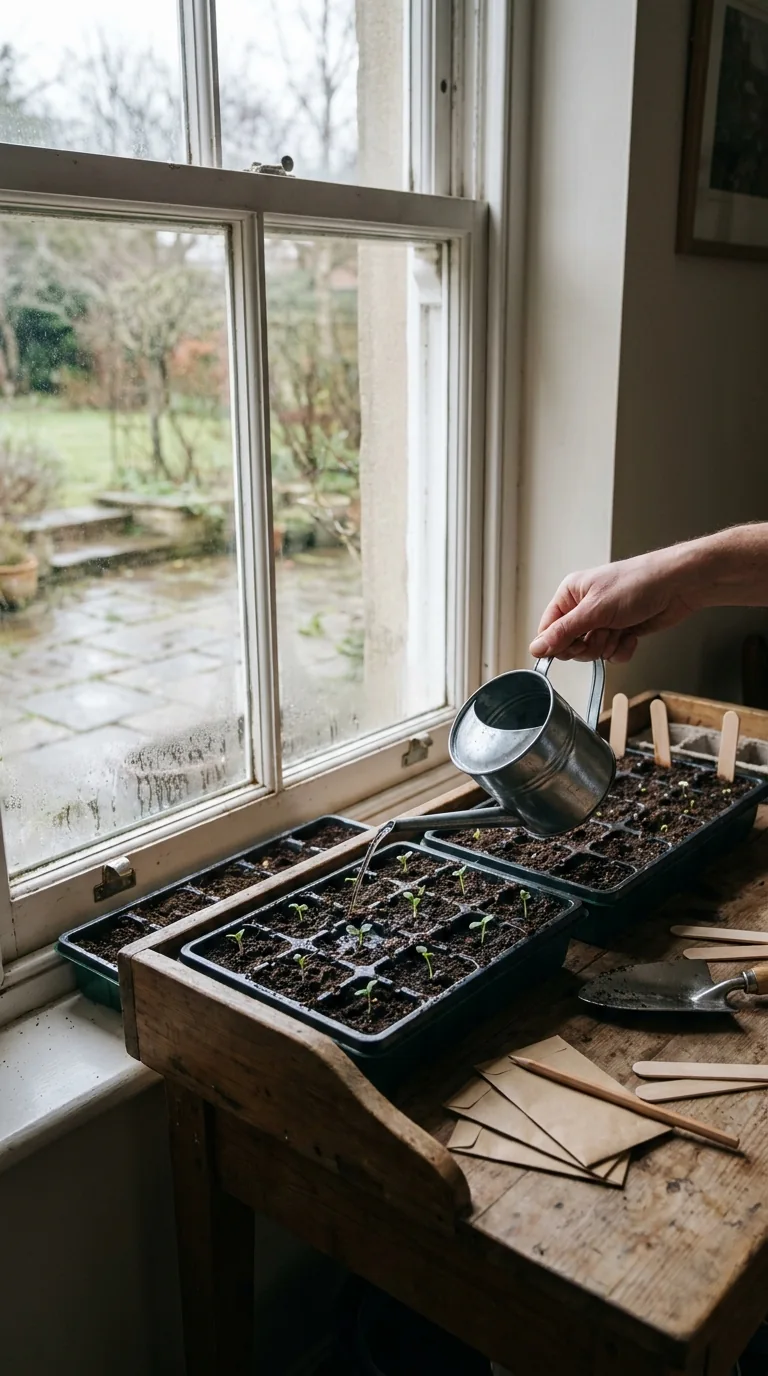
Indoor seed starting works best when it is planned backwards from the conditions plants will eventually meet. The earliest possible germination date is not necessarily the best sowing date. A seedling needs enough light, suitable temperatures, growing room and a route into its final position. Without those, an early start can produce crowded weak plants that are harder to manage than a later sowing.
In the UK, a warm windowsill, an unheated greenhouse and a heated propagation area are different environments. Outdoor planting opportunities also vary with crop, altitude, exposure and the year's weather. Begin with the seed packet's instructions for the named variety, then adapt the plan to your actual facilities. Treat calculated dates as a useful window with checks, rather than a promise that a plant will be ready on a particular morning.
Read the packet beyond the sowing months Find the recommended germination temperature, sowing depth, indoor window and eventual plant spacing. Check whether the variety is intended for outdoor growing, greenhouse cropping or another purpose. Tomatoes bred for greenhouse use may need different management from outdoor varieties. Lettuce intended for summer production should not automatically be chosen for overwintering. Variety information can change the plan even when the crop name is familiar.
Also note whether the crop tolerates transplanting. Carrots and parsnips are usually sown where they will grow because root disturbance can affect the crop. Other vegetables are commonly raised in modules for later planting. Some seed needs special treatment or light to germinate, so do not cover every seed with the same depth of compost. Keep the packet or write its key instructions in your records; the photograph on the front is not enough to reconstruct them later.
Start with the final growing position Decide where the mature plants will live before filling trays. An outdoor bed needs enough warmth, suitable soil and a low enough risk of damaging weather. A greenhouse needs to meet the crop's temperature requirements, and an unheated one can still freeze. A sunny patio pot may warm quickly by day but cool substantially overnight. These details affect when a seedling can leave indoor accommodation.
Check how much room each plant eventually needs. A packet containing twenty courgette seeds does not mean a small garden needs twenty courgette plants. Allow for supports, access and neighbouring crops. Count the containers or bed spaces that are truly available and sow a reasonable spare allowance. Overproduction creates pressure to plant too early or crowd beds, both of which can erase the benefit of raising plants carefully indoors.
Calculate a window rather than an exact date Work backwards using the variety's instructions and a realistic target for planting. Allow for germination, growth to a suitable transplant stage and gradual hardening off, noting that packet guidance may already include some of these stages. Avoid adding every allowance twice. The resulting window is an estimate. Seedlings grow faster or slower with light, temperature and variety, so inspect the plants rather than relying only on elapsed days.
For example, suppose a gardener selects late May as a provisional outdoor planting period for a suitable tomato variety, subject to warm enough nights and local frost risk. If their chosen seed guidance supports roughly eight weeks from sowing to a transplantable plant, a late-March sowing may be reasonable. Hardening off occurs towards the end as conditions permit. This example is not a national recommendation: a colder plot, different variety or greenhouse destination changes the calculation.
Make light the main limiting check A bright window may still provide too little light for a large number of early seedlings, especially in late winter. Plants bend towards the glass, stretch between leaves and become difficult to support. Turn trays where appropriate and avoid placing them far back in a room that looks bright to human eyes. Clean glazing and remove unnecessary shading, but remember that direct spring sunshine can also scorch seedlings behind glass.
If using grow lights, choose equipment suitable for plant raising and follow instructions for distance, duration and safe installation. Keep electrical components appropriate to the damp growing environment. Artificial light can extend the useful sowing season, but it does not remove the need for space, sensible temperatures and watering. If you do not have adequate light, sow later. A compact April seedling can be a better starting point than a stretched February plant that has spent weeks struggling.
Separate germination warmth from growing conditions Some tender crops germinate most reliably with controlled warmth. A heated propagator or mat can help when used according to instructions and the seed's requirements. Do not assume that the hottest available location is best. A radiator can dry compost unevenly, while a sunny enclosed propagator can overheat. Measure conditions if possible instead of judging temperature by the room alone.
Once seedlings emerge, their needs may change. Remove or ventilate the cover as appropriate and provide strong light. Many seedlings benefit from a slightly cooler growing environment than the warmth used to initiate germination, but the suitable temperature depends on the crop. Do not move tender seedlings straight from warmth into a freezing greenhouse. Plan the next stage before sowing so that germination is followed by a suitable home rather than an improvised compromise.
Use clean containers and suitable compost Reuse trays and pots that are sound and can be cleaned, ensuring drainage holes are open. A deep food container without holes is not a ready-made seed tray until drainage is provided safely. Use suitable peat-free seed compost or another medium recommended for the crop. Fine seed needs a sufficiently even surface; large coarse fragments can make shallow sowing difficult. Do not use garden soil indoors as though it were identical to a prepared seed-growing medium.
Fill and settle containers gently without compressing them hard. Water the compost before sowing where suitable, let excess drain and sow at the recommended depth. Label crop, variety and date immediately. If raising several similar crops, durable labels prevent mistakes when the first leaves look alike. Keep a tray underneath to protect surfaces, but do not leave the pots standing in water indefinitely. Good drainage begins with the container and continues with how it is watered.
Sow quantities that fit the next stage Broadcasting an entire packet into one tray can create far more seedlings than you can prick out or house. For large seeds, individual pots or modules often make handling easier. For small seeds, sow thinly and plan when plants will be separated. Keep different varieties clearly divided. A small first batch also lets you test the growing conditions before committing the rest of the seed.
Not every seed will germinate, but allowing for losses does not require excessive sowing. Choose a modest spare allowance based on the seed's age and the crop. Fresh seed of some vegetables remains reliable for several seasons under good storage, while others lose viability sooner. If uncertain, a small germination test can inform the plan. Record the result so that next year's sowing quantity is based on evidence rather than repeating the same crowded tray.
Water to the seedling's actual needs Keep seed compost appropriately moist during germination without making it waterlogged. Small seeds near the surface can dry quickly, while the lower part of a container remains wet. A fine rose or careful bottom watering may help avoid washing seeds away, but drain excess afterwards. Check moisture rather than watering automatically because the tray was watered yesterday.
After emergence, inspect both compost and plants. Persistent saturation, poor airflow and crowded seedlings increase the risk of damping off and other problems. Drying can also kill small plants quickly. Peat-free mixes vary in their ingredients and surface appearance, so feel below the top layer where practical and lift pots to judge weight. Do not assume a dry-looking surface always means the whole rootball is dry. Adjust the method and frequency to the container, crop and conditions.
Prick out and pot on before crowding causes decline When seedlings have developed enough to handle and are becoming crowded, move them carefully into suitable individual spaces. Hold a leaf rather than squeezing the stem and lift with a small tool to support roots. Prepare the new container first so roots are not left exposed. Set the plant at a depth appropriate to the crop and water gently to settle the compost.
Pot on when roots and growth indicate the plant needs more room, using a sensible increase in container size. A tiny seedling in a very large wet pot can be difficult to water well. Check several plants rather than assuming all seedlings develop evenly. Keep useful spares only while you can provide good conditions. If outdoor weather delays planting, potting on a few strong plants may be better than keeping many weak ones trapped in cells.
Harden off gradually before the move Indoor-raised plants need time to adapt to direct sun, wind, lower humidity and cooler temperatures. Begin in a sheltered position for a short daytime period, then increase exposure as conditions allow. Bring frost-sensitive plants back into appropriate protection at night. A cold frame can help, with the lid opened progressively during suitable weather. The process often takes around two to three weeks, depending on the crop and previous conditions.
Acclimatisation does not make tender plants frost-hardy. Stop or reduce exposure during strong cold winds, prolonged rain or a cold snap. Check watering because outdoor air movement can dry small pots quickly. Aim for firm, compact growth rather than pushing soft leaves with extra feed. When plants are ready, choose a suitable planting day and water the rootball beforehand. Keep temporary protection available while the young roots establish in their final position.
Plan different crops differently Slow-starting chillies may justify earlier indoor sowing if warmth and strong light are available, whereas fast-growing courgettes and cucumbers can outgrow indoor space quickly. Tomatoes sit between these extremes but still need variety-appropriate planning. Hardy salads can be raised in cool conditions during suitable seasons. There is no single sowing date that works for every seed packet in a beginner's collection.
Separate the plan into a few batches and record their destinations. Keep warm-germinating tender crops apart from seedlings that prefer cooler conditions. Avoid placing everything in one closed propagator simply because it is convenient. For a very small garden, buying a few healthy young plants may be more practical than raising every crop from seed. Seed starting should serve the garden's needs; it does not have to become a competition to own the greatest number of trays.
Make a small-batch record
A useful seed record can fit on one page. Write the crop and variety, sowing date, medium, germination conditions and number required. Add the emergence date and the number that developed into healthy plants. Later, note potting-on and planting dates, including any delay caused by the weather. Those details help distinguish a seed-quality problem from unsuitable light or an overcrowded tray.
Keep quantities visible. If six tomato plants are required and ten strong seedlings are already growing, another full sowing may create unnecessary work. A small backup batch can be sensible in some situations, but it still needs room. Decide which plants to retain before every sunny surface is occupied.
At the end of the season, compare the record with the harvest rather than judging success by germination alone. A later sowing that established smoothly may have been more useful than an early batch that needed repeated rescue. Use that evidence to choose next year's window, keeping enough flexibility for different weather. The aim is a repeatable routine matched to your home and garden, with only the equipment and plants that you can care for well.
Use a seed-starting tool thoughtfully A seed-starting calculator can help subtract a crop's lead time from a provisional planting window. Check what its lead time includes, how it estimates outdoor conditions and whether you can change the assumptions. If a tool uses only a broad frost date, it cannot assess the actual warmth of your greenhouse or whether your windowsill has enough light. Keep its result beside the packet guidance rather than treating it as a replacement.
Use the UK vegetable planting calendar to see how sowing, transplanting and harvest stages fit into the year. Then make a short practical schedule: prepare containers, sow a manageable number, check emergence and review space before the next batch. A useful indoor start produces healthy plants at the time the garden can receive them. Later sowing with good conditions often serves that aim better than an early date chosen without a plan.

