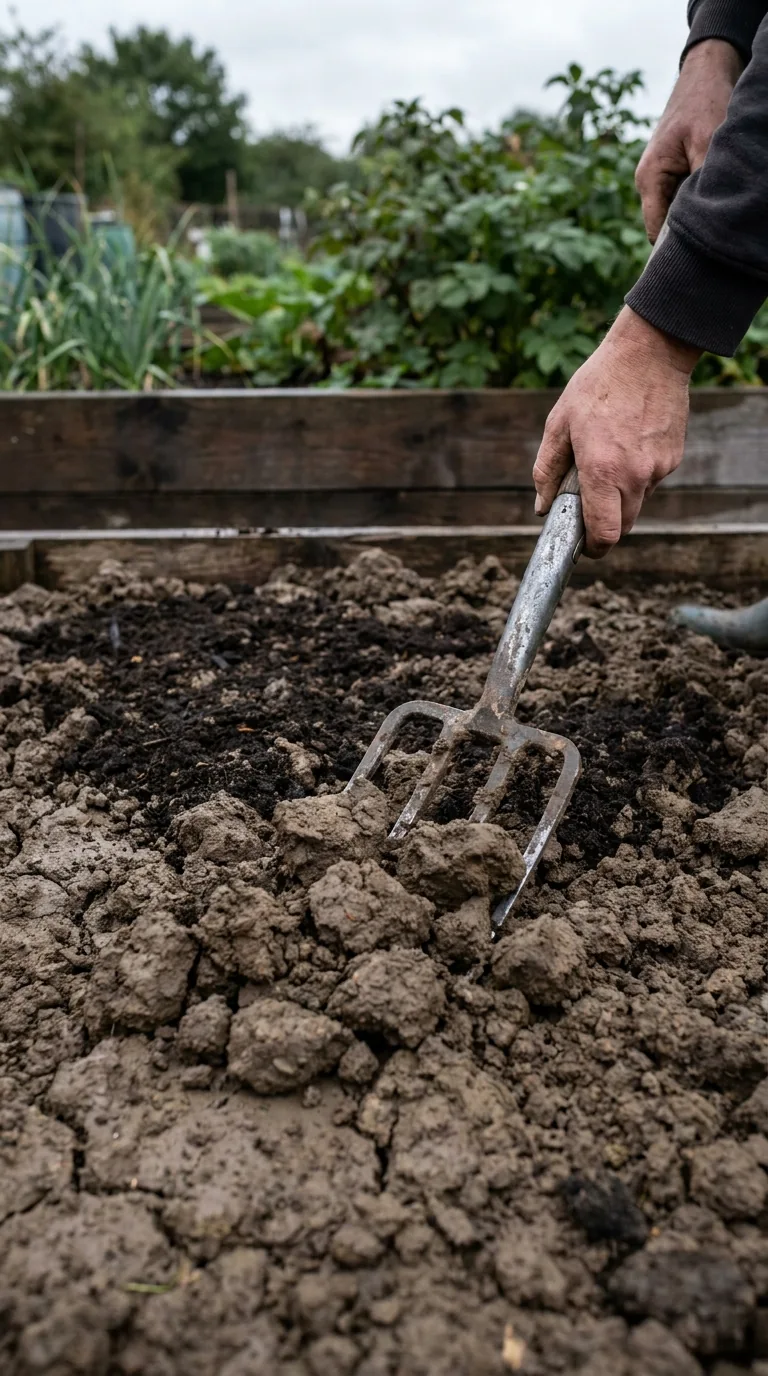
Improving clay soil means helping it develop a workable structure while preserving its natural ability to hold water and nutrients. It does not mean turning it into sand. Many productive UK gardens grow on clay, but the timing of work and the way people move through the plot make a substantial difference. The most useful first improvement may be a path that stops repeated trampling, rather than a bag of amendment.
Clay can be sticky after rain, slow to warm in spring and hard when dry. Those characteristics create a narrow working window. Treat the soil according to its current condition rather than a calendar promise. A mild February weekend does not make saturated ground ready for digging, and a dry June afternoon does not make baked clods easy to cultivate. Plan flexible jobs so that suitable days can be used well.
Check that clay is really the issue
Take a moist handful from below the mulch layer. Clay-rich soil often feels smooth and sticky and can be rolled into a short sausage. Very clay-rich material may develop a shiny smear when rubbed. Compare several places, because landscaping and building work can leave different soils side by side. A hard surface alone does not prove heavy clay: compaction, rubble or a thin layer of fine silt may also interfere with growth.
Observe the garden after ordinary rain and after prolonged wet weather. Does water remain only in a footpath? Does a whole bed stay saturated? Is runoff arriving from a patio or neighbouring higher ground? Clay texture is one part of the diagnosis, not a complete explanation of every puddle. A naturally high water table cannot be corrected by spreading a surface layer of compost, however useful that compost may be for soil structure.
Check pH separately if the planned plants have particular requirements. Clay soil is not automatically alkaline, and lime should not be added just because the soil is sticky. Existing healthy plants provide useful clues about the site's practical possibilities, but not a substitute for testing when treatment depends on the result. Record where the ground is wettest and where it becomes workable earliest; that map will guide bed layout.
Prevent compaction before trying to reverse it
Repeated walking and barrow traffic compress wet soil. The damage is especially frustrating because a gardener can undo gradual improvements in a single busy planting session. Establish permanent paths and beds narrow enough to reach from the edges. A width around 1.2 metres may suit someone who can comfortably reach 60 centimetres from either side, but adjust it to your own reach and access needs.
Put frequently harvested crops where they can be reached without entering the bed. If a hose tap, compost bin or shed makes you cross the same patch repeatedly, redesign that route. A few stepping stones may be enough in a border; an allotment may need a more substantial path. Do not treat a board laid on saturated ground as permission for unlimited traffic. It spreads load, but does not make wet clay immune to compression.
Keep heavy equipment away when the ground is soft. If building work is planned, agree access routes and soil protection before vehicles arrive. Repairing deep machine compaction is a different job from loosening an ordinary vegetable bed. Where a dense subsoil layer or buried construction waste is suspected, investigate carefully and seek suitable advice before hiring a rotavator and mixing the whole profile together.
Use the soil's working window
Before cultivation, squeeze a small sample and try to crumble it. If it smears into a sticky mass and adheres heavily to tools, delay. If it breaks into hard, sharp lumps that resist a fork, it may be too dry for productive work. The useful middle condition varies by clay type and weather. A test in one corner is faster than digging half a bed and discovering that every spadeful has been compacted into a slab.
When work is needed, choose a period when the soil is moist enough to break apart but not wet enough to smear. Autumn can offer opportunities before prolonged winter wet, but the weather is the deciding factor. Do not dig simply because an old gardening schedule says the month has arrived. Prepare alternative tasks such as cleaning pots, sorting seed or repairing supports for days when the ground is unsuitable.
A fork may allow gentler loosening than repeated spade slicing, particularly around existing plants, but any tool can damage wet soil. Avoid aggressive repeated rotavation that breaks the surface into a fine powder or creates a compacted layer at a consistent depth. Aim for useful aggregates and access for roots, not a seedbed that looks like flour. Clay does not have to resemble bagged potting medium to support good plants.
Add suitable organic matter
Mature garden compost, well-rotted organic material or other appropriate bulky soil improvers can support a better soil structure. Choose a clean, mature product and apply it for a defined purpose. Very fresh, woody waste is not interchangeable with finished compost. Unknown manure may bring weed seeds or herbicide residues, so establish its origin and suitability rather than assuming every free trailer load is beneficial.
On established beds, a surface application avoids repeated disturbance around roots. Remove persistent weeds first, check that the soil beneath is moist, then spread an even layer without piling it against crowns or stems. In an empty bed that genuinely needs cultivation, organic material can be incorporated when the soil is workable. Either approach needs time. A single addition cannot permanently cancel traffic damage or remove an impermeable layer beneath.
Measure how much material the job requires. A 3-metre by 2-metre bed covers 6 square metres. A 5-centimetre layer needs 0.30 cubic metres, or 300 litres. If you have only 100 litres, it may be better to improve a 2-square-metre priority area properly than scatter a nearly invisible coating everywhere. Keep the calculation separate from any nutrient treatment: depth of mulch is not a fertiliser dosage.
Consider a no-dig bed arrangement
A no-dig approach uses surface additions and permanent access routes instead of repeatedly turning the whole bed. It can be particularly practical where wet clay is easily damaged. It does not mean ignoring perennial weeds, never making a planting hole or refusing to investigate a compacted base. Establish the bed thoughtfully, then avoid unnecessary disturbance that exposes and compresses the soil again.
For a worked example, divide a 4-metre-wide plot into two reachable growing beds with a central path and side access as space permits. Keep compost application inside the growing area and use the path for watering, planting and picking. Over a season, compare the bed surface with a previously trodden strip. The aim is not to prove a universal system superior, but to see whether reduced traffic makes your particular soil easier to manage.
Do not bury persistent weed roots under a thin decorative layer and declare the bed complete. Remove or control them appropriately before planting. Where sheet materials are part of bed establishment, consider water movement, existing plants and the material's composition. Long-term soil care still depends on maintaining plant cover, adding appropriate organic matter and observing how the ground behaves in wet weather.
Do not expect a little sand to solve heavy clay
A few bags of sand scattered over a clay bed rarely change its fundamental texture. Altering the mineral balance substantially would require far larger quantities than most gardeners expect, and an ill-judged mixture can make the soil less manageable. Sand is useful in some specified growing media and engineered projects, but that does not justify adding arbitrary amounts to a whole border.
The practical alternative is usually to protect structure, use appropriate organic matter and select plants suited to the site. If a specialist recommends mineral additions for a small area, ask for the material specification, quantity, incorporation depth and expected result. Trial a manageable patch rather than committing the entire garden. A comparison beside untreated ground is more informative than a marketing claim printed on a bag.
Gypsum and lime also need discrimination. Some soils respond to calcium additions; others do not benefit enough to justify treatment. Lime changes acidity, which may be undesirable. Do not spread either product as a compulsory clay ritual. Where a treatment is suggested, establish why it suits your soil and assess a small trial. Neither creates an outlet for groundwater or repairs a broken drain.
Plant for the conditions you actually have
Many roses, shrubs and other established perennial plants can perform well on suitable clay ground. Their roots can occupy the same soil for years without annual digging. Suitability still depends on drainage, light, pH and the individual plant. Heavy soil that drains slowly is different from a bed that remains saturated for weeks. A label saying tolerates clay should not be read as survives permanent standing water.
When planting, wait until the ground is workable and avoid polishing the sides of a hole into a smooth basin. Loosen smeared edges where necessary and follow appropriate planting depth guidance. Do not create a tiny pocket of highly enriched, radically different material in otherwise dense clay and assume roots will automatically leave it. Improve the broader growing area where practical, and water the rootball as well as the surrounding soil during establishment.
For vegetables, patience in spring may produce better results than forcing early sowings into cold wet ground. Start suitable crops in modules if that fits their requirements, then transplant when conditions allow. Choose paths and crop spacing so that harvest does not require standing on the bed. Root crops needing a fine seedbed may be easier in a separately prepared area than in the stickiest part of the plot.
Raised beds help access, but need a drainage plan
A raised bed increases the depth of soil above the original surface and can reduce trampling. Its success depends on the base and the route water can take. A timber frame filled above a persistently flooded hollow is not automatically a dry root zone. Observe water levels first, and avoid designs that direct overflow towards buildings, neighbouring property or important access routes.
Use a suitable fill rather than only loose compost, and allow for settling. Keep soil levels appropriately below building damp-proof details. Where bed walls retain substantial wet soil, their construction needs to withstand the load. For a modest vegetable bed this may be straightforward; for a deep retaining structure it is a design issue requiring appropriate expertise. Raising soil should solve an identified garden problem, not conceal it.
Protect summer moisture without keeping crowns wet
Clay's water-holding ability is useful during dry periods, but newly planted rootballs can still dry out. Check below a surface mulch before deciding whether to water. Large cracks can route water away from the rootball, so apply water slowly and observe where it goes. Do not assume a single puddle near the plant proves the whole root zone has been moistened.
Maintain an appropriate organic mulch while keeping it clear of stems. Reduce exposed bare soil where practical, and choose planting combinations that fit the site's moisture supply. If you also garden on a contrasting light patch, sandy-soil moisture management requires a different emphasis. Treat the two areas separately instead of applying the same watering and improvement routine everywhere.
Review progress over seasons
Look for easier crumbling when the soil is suitably moist, fewer compacted footprints and more consistent plant establishment. Record changes in puddle duration after comparable rain, but remember that weather varies from year to year. A dry spring can make a treatment look more successful than it is. Continue the practices that protect the soil and reconsider any product that produces no clear benefit. Good clay management is a repeatable routine, not a one-week transformation.
Photograph a small test area from the same position each season and note the soil condition when you work it. Keep records of organic matter quantities and access changes. This helps separate a genuine improvement from a temporary weather effect. If standing water persists despite better surface care, investigate the wider drainage problem instead of continually increasing the compost layer.
Choose one practical change to maintain consistently: permanent access, suitable surface feeding or delaying cultivation until the soil is ready. Check that everyone using the plot understands it. Shared access habits can have a larger effect than a treatment applied once and then forgotten. Keep tools clean enough to recognise when soil is smearing, and stop work when conditions deteriorate during the session.

