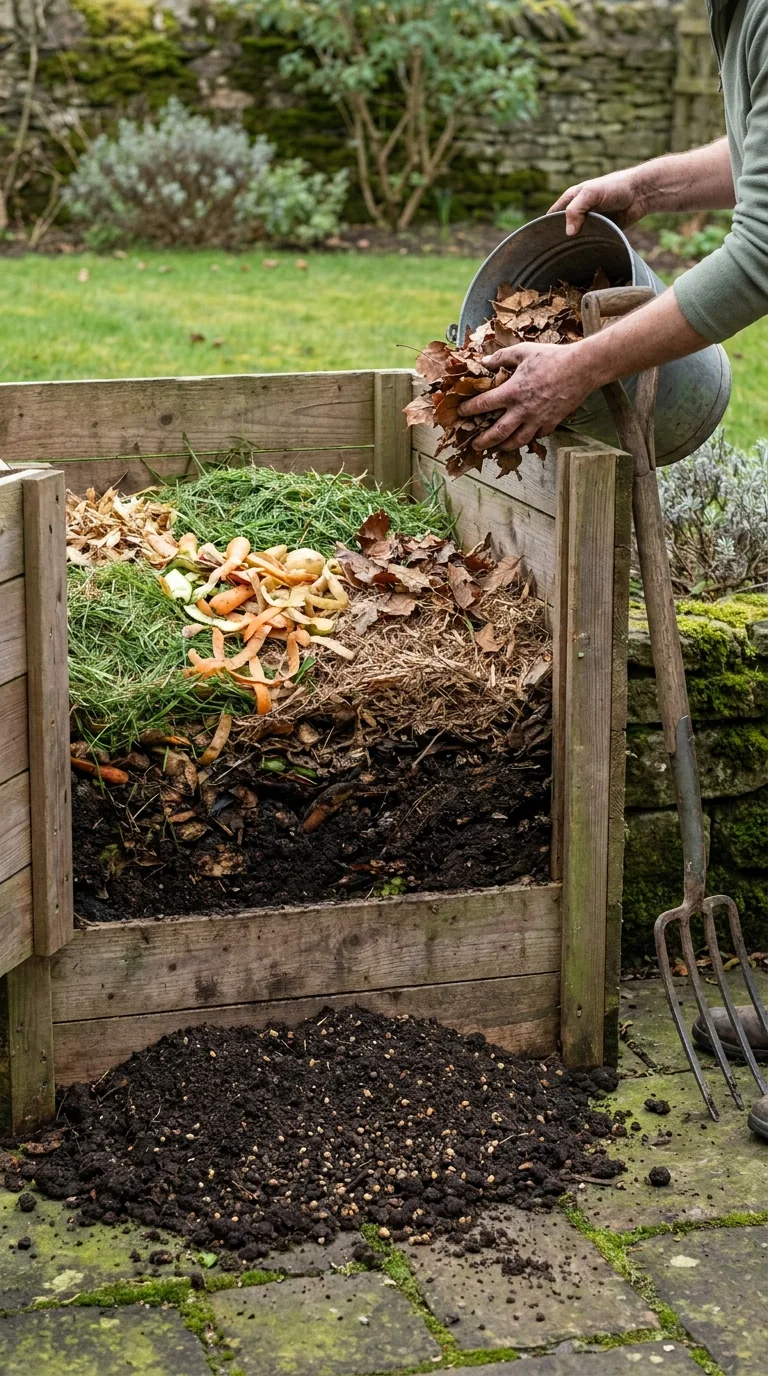
Home composting turns suitable kitchen and garden leftovers into material that helps look after garden soil. The useful result is garden compost: a crumbly soil improver for beds and borders. It is different from a bag of seed compost or potting compost, which is formulated to support roots inside containers. Start with that distinction and the project becomes simpler. You are managing a decomposition process, rather than trying to manufacture a perfectly uniform commercial product.
A small garden bin can work without machinery, bought activators or daily attention. What it needs is a manageable supply of varied plant material, enough moisture, access to air and time. Cold weather, woody ingredients and a small volume usually mean slower progress. A cool bin is not automatically a failed bin. Judge it by how its contents change, how they smell and whether the oldest material is becoming recognisably composted.
Choose a system you can actually maintain
A lidded plastic bin suits many small gardens because it contains loose material and keeps direct rain off. A wooden bay is useful where a larger garden produces bulky clippings. Two bays make it easier to separate a filling batch from a resting one, but one bin is enough to begin. Leave working space in front of the opening. A bin wedged behind a thorny shrub may fit on paper but become awkward when you need to empty it.
Choose a sheltered position that is accessible in winter. Partial shade helps avoid large swings between baking dry conditions and soaking rain. Direct contact with soil provides drainage and access for decomposers. If the only suitable position is on paving, check that liquid will not collect around the base or run towards a doorway. Follow the bin manufacturer's instructions for its base. Do not seal the material inside an airtight box: ordinary garden composting depends on air.
A tumbler can make mixing easier for some gardeners, but check its loaded weight and access height before buying. A wormery is a different system with its own feeding limits; a general garden bin cannot simply be managed as a wormery. Similarly, a specialist food-waste composter may accept ingredients excluded from a basic heap. For a first ordinary bin, keep the recipe conservative and learn its behaviour before adding complicated equipment.
Build a useful ingredient mix
Fresh leafy material, vegetable peelings, spent annual plants and small amounts of grass clippings are commonly described as greens. Dry stems, torn plain cardboard, dry leaves and chopped woody prunings are browns. Those labels describe their composting role rather than their actual colour. A green branch can contain a great deal of woody material, while a brown-looking vegetable peeling is still a soft, wet ingredient. Consider texture and moisture as well as the labels.
Keep a covered sack of torn cardboard or other dry material beside the bin. This solves a common practical problem: kitchen scraps arrive regularly, but garden browns arrive seasonally. Add and mix some dry material when adding a wet kitchen caddy. Do not leave a thick cap of peelings exposed on top. Tear cardboard into manageable pieces, remove tape and plastic labels, and avoid glossy laminated packaging that will leave fragments behind.
As a starting guide, aim for a mixture containing roughly a quarter to a half soft green material, with the rest drier, woody browns. This is a loose volume guide, not a laboratory carbon calculation. A bucket of compressed grass behaves differently from a bucket of loose stems. The better test is whether the mixture remains open and moist without becoming slimy. Adjust the next addition according to what you find below the surface.
Prepare material before it enters the bin
Long stems can bridge across a bin and conceal an empty space underneath. Cut them shorter with secateurs, or keep very woody pieces for a separate slow pile. Large cardboard sheets can form water-resistant layers; tear them and mix them through instead. Shredding speeds access to woody material, but a shredder is optional. Avoid creating a heap made entirely from fine particles, because some coarser texture helps keep air spaces open.
Grass needs particular care. A full mower box tipped in as one dense layer can mat together, smell and exclude air. Mix small amounts into existing material, combining them with dry stems or shredded cardboard. If mowing produces more grass than you can balance, use an appropriate alternative disposal route or leave suitable short clippings on the lawn. A bin should not become a compulsory destination for every piece of garden waste.
Keep unsuitable ingredients out
For a straightforward cool garden bin, avoid meat, fish, dairy products, cooked meals and greasy food. These create unnecessary pest and odour problems in a system not designed to process them. Exclude dog and cat faeces, cat litter, glass, metal, conventional plastics and treated timber. A package marked compostable is not necessarily suitable for a home bin: some products require industrial treatment. Use the specific home-composting instructions rather than assuming that a green-looking label is sufficient.
Persistent weed roots, mature seed heads and badly diseased plant material need a separate decision. A small domestic heap may never heat consistently enough to destroy them. Keep invasive plant fragments out, and follow appropriate local guidance for their handling. When removing a seed-filled weed from a border, do not shake every seed into the bin. For plant material treated with a herbicide, check the product's composting restrictions and waiting period; unknown treatment history is a reason to be cautious.
Manage moisture without drowning the heap
Lift a little material from the middle rather than inspecting only the top. It should feel moist, with a texture that holds together loosely without releasing a stream of liquid. If the centre is dry and papery, add water gradually while mixing. A quick splash over the lid opening may wet one narrow channel while leaving the rest dry. Use a watering can in stages and check several places as you go.
If material is sodden and smells sour, first stop adding more wet greens. Mix in dry, structurally open browns, and check that rain is not entering through a missing lid or broken cover. A loose cover can exclude direct rainfall while leaving ventilation. Do not line an ordinary bin with an impermeable bag that traps liquid. Equally, do not try to solve excessive moisture by leaving the contents uncovered throughout a week of heavy rain.
Introduce air at a realistic pace
Turning means redistributing the material so that compacted areas loosen and outside pieces have a chance to decompose further inside. If you have two bays, transfer a batch between them. With a single bin, a fork can help lift and mix accessible portions, provided the bin shape allows safe working. Work in small amounts rather than trying to lift a heavy, tangled mass. Wear gloves and avoid breathing dust from very dry material.
There is no universal weekly turning requirement. A gardener who mixes ingredients carefully at the start may manage a slow heap with occasional checks. A person seeking faster results may mix more often, but needs sufficient material and effort to justify that approach. If your back or mobility makes turning difficult, plan a slower system with smaller ingredients and a good starting mixture. Do not let an unrealistic maintenance target prevent composting altogether.
Keep fresh additions separate from finished material
A continuously filled bin contains material of different ages. Finding a fresh potato peeling beside dark compost does not mean all of it is ready. Once the bin is full, allow it to rest if space permits and direct new scraps elsewhere. Alternatively, remove the older lower material when your bin is designed for this, then return recognisable unfinished pieces to the active batch. A simple label saying filling or resting makes the system easier for everyone in the household.
For example, a household with one compact bin might save dry leaves in autumn, feed the bin through spring, then stop adding when it is full. During the resting period, suitable new waste can use a second small bin or the council collection. This does not promise a fixed completion date. It simply creates a batch that can finish without being repeatedly mixed with fresh scraps, which makes readiness easier to assess.
Recognise when garden compost is ready
Finished compost is generally dark, crumbly and pleasantly earthy. Most soft original ingredients should be unrecognisable. A few small woody pieces are common and can be returned to the next batch. A slimy mixture smelling of rotting vegetables needs further treatment, not immediate spreading around delicate plants. Material that still resembles dry cardboard and stems has not completed the same process, even if its surface has turned brown.
Expect ordinary home composting to take months, and sometimes much longer than a year. Volume, ingredient size, temperature and management all matter. Calendar age alone cannot confirm maturity. Keep the finished material separate from fresh waste and use it where its variable texture and nutrient content are acceptable. For tiny seeds in trays, a fresh, suitable seed-sowing medium offers more predictable conditions than unsieved homemade garden compost used alone.
Use the result where it does the most good
Spread mature compost over a weeded bed as a soil-improving mulch, keeping it away from plant stems and crowns. Apply to moist soil rather than burying a layer of dust-dry ground. You do not have to excavate an established border to use it. Soil organisms and ordinary surface management gradually incorporate organic material. In a vegetable bed, clear crop debris and persistent weeds first so that the compost layer does not conceal problems that need removing.
Measure the area before promising compost to the whole garden. A bed measuring 2 metres by 3 metres covers 6 square metres. A 5-centimetre surface layer requires 6 × 0.05 = 0.30 cubic metres, or 300 litres, before allowing for uneven ground. A small bin's usable finished output may cover only part of that. Prioritise a bed where added organic matter will be useful instead of stretching a token dusting across every border.
When deciding whether a new raised bed needs a bulk soil fill or merely a surface improvement, compare garden compost with topsoil before ordering materials. Homemade compost is valuable, but it is not a replacement for every material sold for growing plants. Using it for the right job avoids disappointment and preserves the stable soil beneath.
Troubleshoot one problem at a time
| What you find | Check first | Practical adjustment |
|---|---|---|
| Sour smell and matted contents | Excess wet greens and poor air access | Mix in dry browns, loosen compacted areas and exclude direct rain |
| Dry material with little change | Moisture inside the batch | Water gradually during mixing and add suitable fresh greens |
| Large recognisable stems | Ingredient size | Chop them and return them to the active batch |
| Frequent flies around scraps | Exposed kitchen material | Mix and cover fresh scraps with garden material |
After an adjustment, allow time before changing something else. A notebook entry recording what was added and what the centre felt like is more useful than buying several treatments at once. If a bin attracts rodents, review excluded food, access points and the site's wider food sources; do not treat repeated sightings as a harmless requirement of composting. Seek appropriate local pest advice where needed.
At the end of the first batch, assess the whole routine. Was the kitchen caddy easy to empty? Were browns available? Could you remove finished material without dismantling the garden? Improve those practical details before increasing capacity. A modest system that produces useful compost repeatedly is a better fit than a large, inaccessible heap that nobody wants to manage.
Make a simple first-week plan
On the first day, position the bin, check its lid and collect a reserve of dry browns. On the next kitchen-caddy emptying, mix the scraps into an open-textured layer rather than leaving a wet mound. After the next mowing, add only the grass that you can balance with that reserve. At the weekend, lift a small sample from inside and check moisture. These checks establish a routine without requiring a full turn of the bin every day.
Keep a fork or hand tool nearby only where it can be stored safely and kept dry. Explain the accepted ingredients to other household members, especially if a council food-waste service takes items that your home bin cannot. Two clearly different containers prevent cooked leftovers and packaging entering the wrong system. Once that sorting habit works, maintaining the bin becomes a small part of normal garden care.

